
Temari
Pattern GT67 / TemariKai
Simple Division Patterns
| Intermediate design. Interpreted design, found in multiple sources; StitchAlong and UStream presentation, contributed by Ginny T. | |
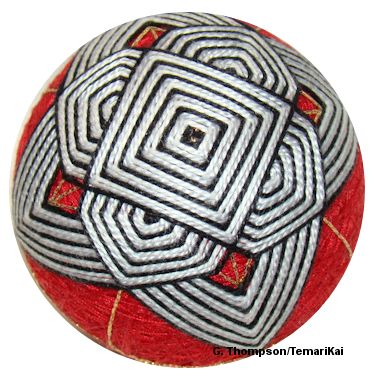 |
Materials: 24 cm circumference mari, wrapped in red For stitching: Pearl cotton #5 in colors of your choice; black, gray and white are used here. Marking thread in fine gold metallic Prepare a Simple 8 Division with gold metallic thread |
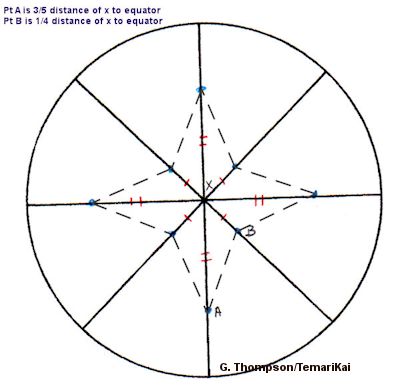 |
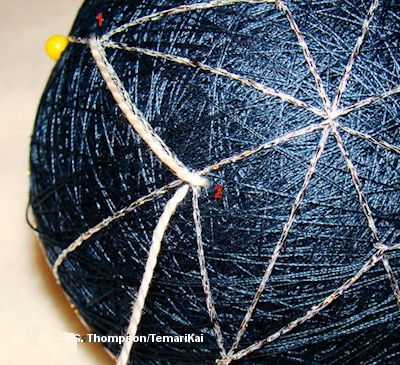
Add extra marking line (on both hemispheres) using gold metallic as shown in diagram to left. Pt. A (lower point, closest to equator) is 3/5 of the distance from pole to equator; Pt B (upper point, closest to pole) is 1/4 of the distance from pole to equator. |
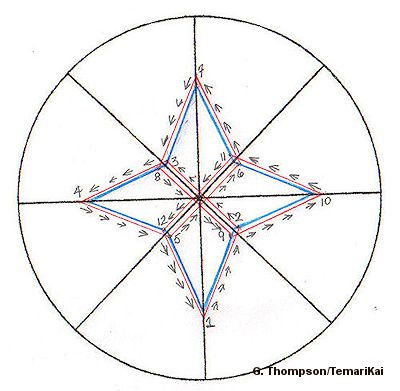 |
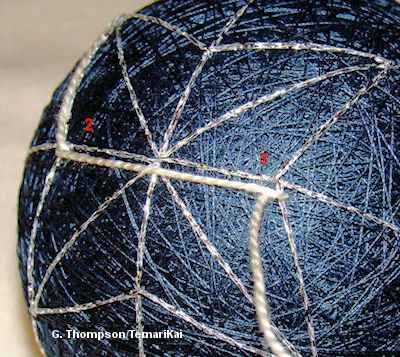
This is a mawashi-style design: the motif is worked continuously in one thread, starting and ending at the same point. Stitching begins at Pt 1, follows the path as shown by arrows, to points in consecutive order. Some stitches are taken around the original marking lines, and some are taken around the extra marking lines. DO NOT stitch around the working thread. |
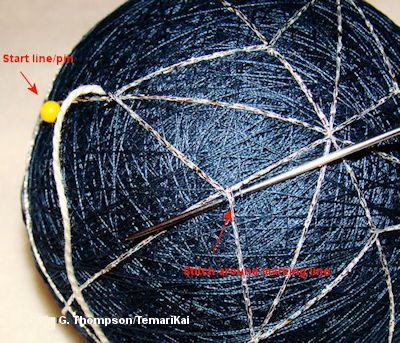 |
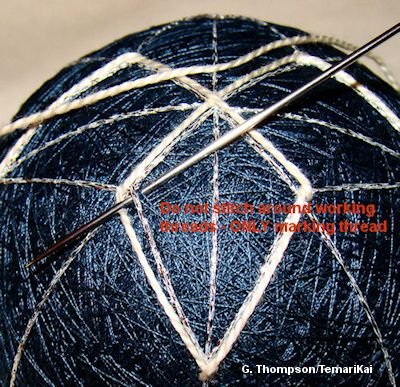
 Anchor
a stitching thread to the left of a marking line just below one
of the long points created by the extra marking line. Place a
pin on this line to keep track. Carry the thread as shown in
photo to left, taking a stitch around the extra marking line,
just below the original marking line. Always turn the mari so
that you are taking a stitch from right to left, whatever line
you are stitching around. Anchor
a stitching thread to the left of a marking line just below one
of the long points created by the extra marking line. Place a
pin on this line to keep track. Carry the thread as shown in
photo to left, taking a stitch around the extra marking line,
just below the original marking line. Always turn the mari so
that you are taking a stitch from right to left, whatever line
you are stitching around. |
 |
Carry the thread across the center of the pole as shown to the
left, and take a stitch on Pt 3, around the extra marking line.
Bring the working thread out below the laid thread. |
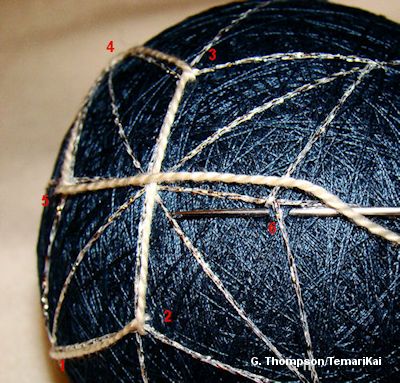 |
Carry the thread down to Pt 4, take a stitch around the
marking line, up to 5 and stitch around extra marking line,
across to 6 and stitch around extra marking line. This has
established the stitching path that will be continued. |
 |
Continue to follow the established path (refer to the stitching path diagram if needed). When you begin to use lines that have adjacent pattern threads, be sure to NOT stitch around the working thread(s) - only the marking threads. Use your needle or finger to gently nudge the threads away from the stitching position. They will fall back into place as you move on, and a small amount of grooming will maintain the orientation. |
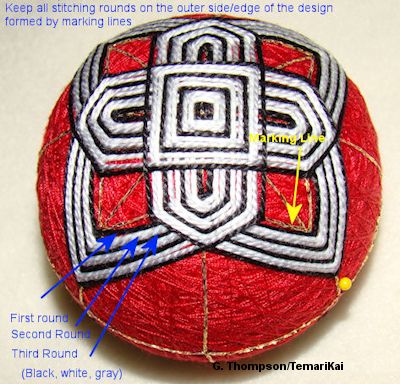 |
Once the stitching path is established, work as many rounds as
desired in colors of your choice. All stitching rounds are
placed on the outer sides/edges of the design, and the motif
works outward. Keep an eye on the parallel lines formed in the
pattern, and that right angles are sharp. The crossovers should
fall on marking lines, as shown in the photo to left. |
This
is a TemariKai.com Printable Page; © 2014, all rights reserved.
Right click to print one copy for personal use.
Last updated 1/2014 © 1998 - 2014 TemariKai.com, G. Thompson/PuffinStuff, Inc.