
Temari
Pattern RW01 / TemariKai
Simple Division Patterns
| Intermediate design. Interpreted from other source. Originally posted 2005; contributed by Ryan W. | |
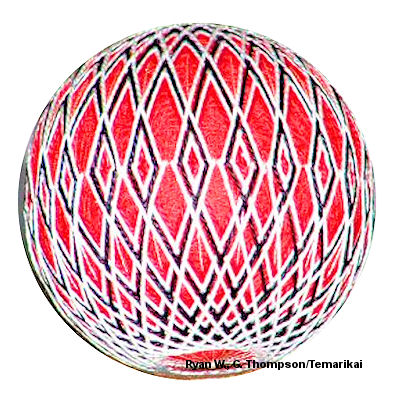 |
Materials: 24cm (or larger) circumference mari, wrapped in
red. Pearl Cotton #5 in white and red Marking thread is fine silver metallic. |
Prepare a Simple 24 division with fine silver thread.
1. Put a pin on a division line 1/4" - 3/8" down from the pole. Put another pin on the same division line the same distance from the opposite pole. These are the top and bottom of the diamond.
2. Put 2 pins on the equator line, each on the 4th division line on either side of the top-bottom line. (webmaster's note, corrected via TalkTemari 5/15/05) - you will be stitching large diamond shapes, using the previous placed pins as the top and bottom of the diamonds; the side "corners" will be on the equator, on the "first" and "ninth" lines).
3. Start stitching at the left equator pin. Stitch at each pin completing the diamond. On completing the last stitch, travel under the mari wrap to the next division line at the obi. There is no need to place any pins at the remaining equator lines because the crossed division/equator lines hold the stitches firmly.
4 Repeat, moving left each time and soon you'll see that the diamonds begin to complete interweaving at the equator, forming the center of the small diamonds
on the equator line. Continue until all division lines have been linked with diamond shapes. If you have put pins at all the pole points, you can remove them now, but keep the top/bottom pins in place to give you a clue about where the starting point is.
5. Stitch the remaining 3 rounds as you did the first complete round.
This is a TemariKai.com Printable Page; © 2014, all rights reserved. Right click to print one copy for personal use.
Last updated 2/2014 © 1998 - 2014 TemariKai.com, G. Thompson/PuffinStuff, Inc.