
Temari
Pattern LW02 / TemariKai
Simple Division Patterns
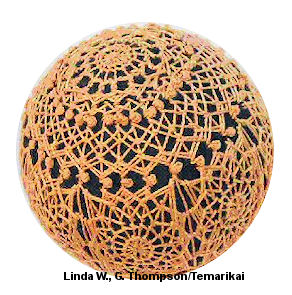
| Advanced design. Interpreted from the Japanese book Atarashii Temari 3, ISBN4-8377-0281-3.. Originally posted 2005; contributed by Linda W. | ||
|
Materials: 32cm circumference mari, color of your choice. Pearl cotton color of your choice. Use same for marking the mari. Prepare Simple 16 division. | |
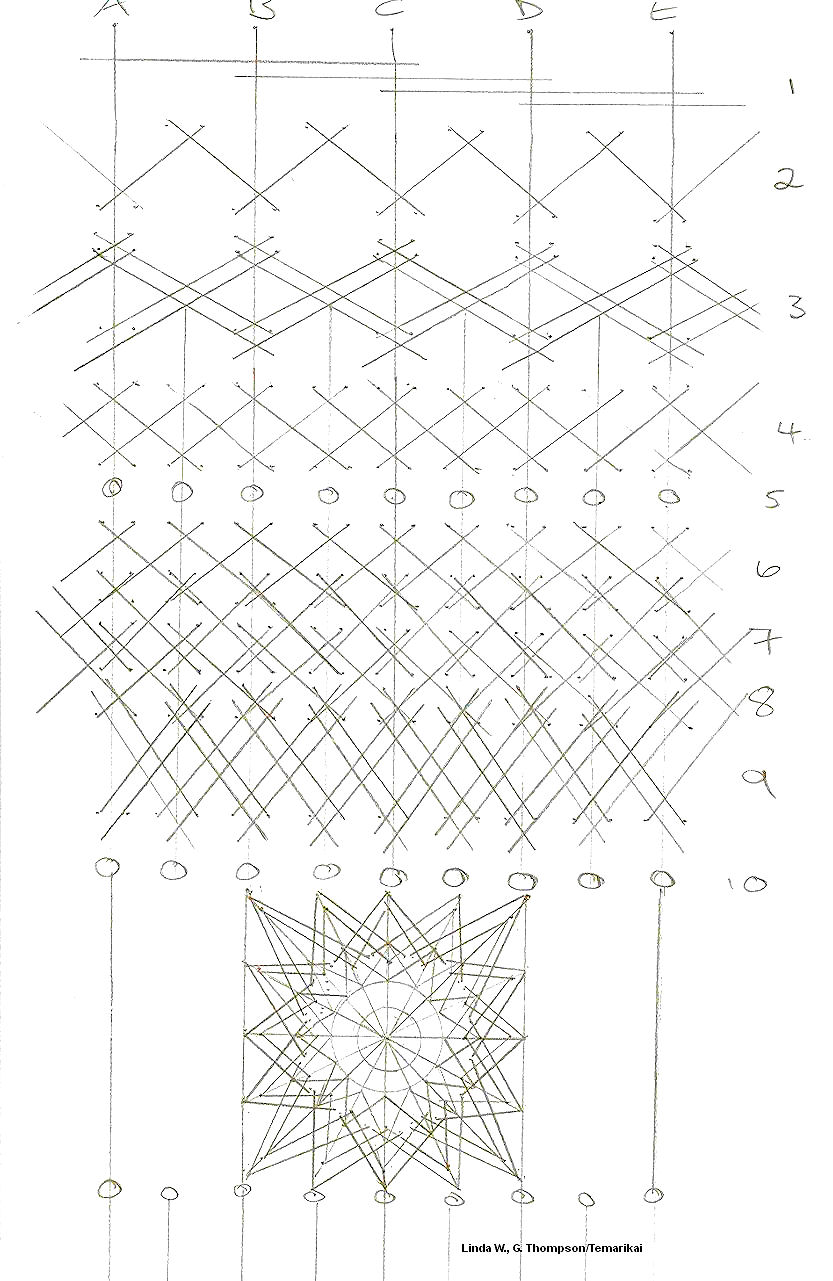 |
The pattern is worked from the poles towards the equator,
leaving the equator to be stitched last. Use the pattern
drawing below to work the following: 1. Create a circle, 2mm from the pole. Work thus: (chidori kagari) bring the needle up at A, down at C, up at B, down at D and so on until you have a complete circle. Repeat 2mm from the first circle and then 5mm from the second. 2. Do a complete round of chidori kagari stitches, taking a small stitch between the marker lines (just above the third circle) and then approx 5mm down on the adjacent line. 3. Do a double round of uwagake chidori kagari stitches using the marker lines for all stitches. At this point, insert additional marker lines, approximately 3cm long, to form a 32 section mari. 4. Complete one round of chidori kagari stitches, using all marker lines. |
| 5. Do a round of French knots (I ‘twisted’ the thread
around the needle 5 times to get nice big knots which stand up). 6. Another complete round of chidori kagari stitches using all marker lines. 7 & 8 Do 2 rounds of uwagake chidori kagari, starting inside the points of the previous rows stitches. 9. Do a double round of uwagake chidori kagari, starting inside the points of the previous rows for the first round and taking the second layer outside the first layer, as in normal kiku designs. 10. Complete another round of French knots as in 5. above. 11. Note, the bands of kiku stitches should all be approximately 5mm wide. 12. You are now back to a 16 division mari and ready to complete the equator stitching.. Add a further 4 marker lines, bisecting the equator and the middle of each of the three marker lines, to form the ‘star’ shape for the medallions. Work each ‘medallion’ across 3 division lines, as per diagram. 13. Create 2 circles as at the north and south poles, approximately 5mm from the centre and 5mm apart. 14. Do one complete round of uwagake chidori kagari, taking lower stitches approximately halfway along each marker line. 15. Complete one double round of uwagake chidori kagari stitches as in step 9 above, starting the first layer of stitches inside the points of the previous round and the second layer outside as in normal kiku patterns. |
This
is a TemariKai.com Printable Page; © 2014, all rights reserved.
Right click to print one copy for personal use.
Last updated 2/2014 © 1998 - 2014 TemariKai.com, G. Thompson/PuffinStuff, Inc.