
Temari
Pattern GT14 / TemariKai
Simple Division Patterns
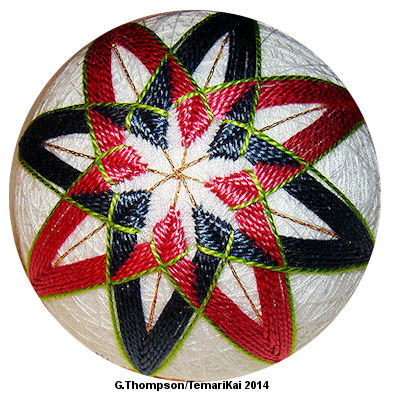
| Beginner design. One of the most basic and quintessential temari designs, often used a first lesson in temari making. This is a kiku design, worked in uwagake chidoi kagari. Originally posted in 2011; contributed by Ginny T. | |
 |
Materials: 23-25 cm circum mari, wrapped in white Pearl cotton #5 in 2 colors; a 3rd may be used as finish round. Medium gold metallic thread. Prepare a Simple 8 division with gold metallic thread. |
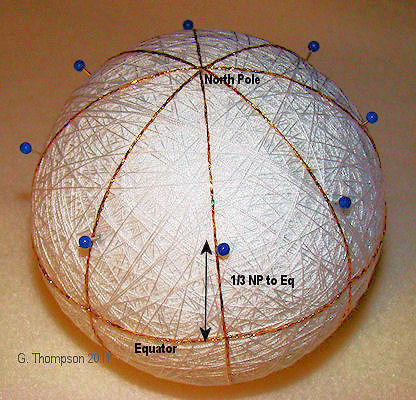 |
Measure distance from North Pole to equator. Place pins on each line, 1/3 of this distance up from the equator. |
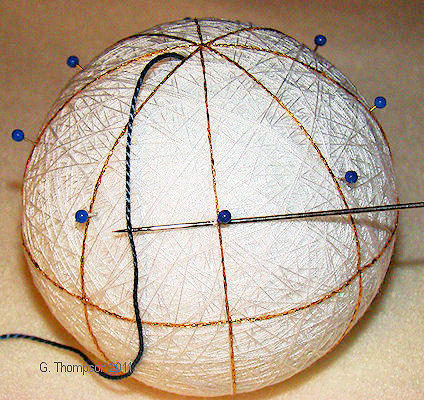 |
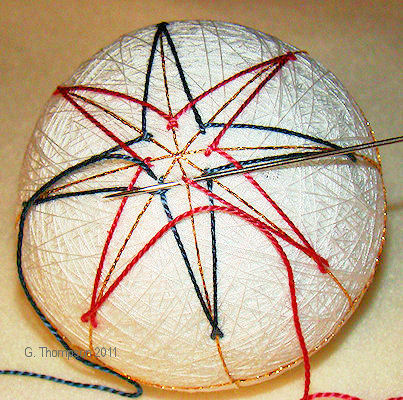
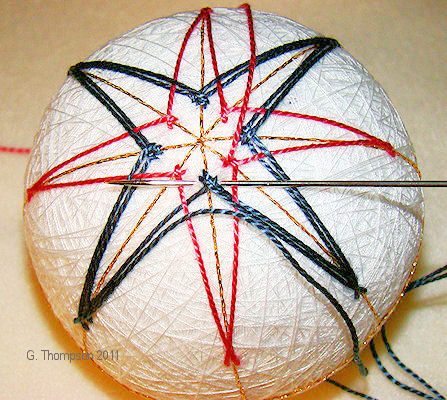
With Color A, enter a length of working thread just to the left of one marking line, 5 mm down from the NP. Move 1 marking line to the right and take small stitch (kagari) just below pin. |
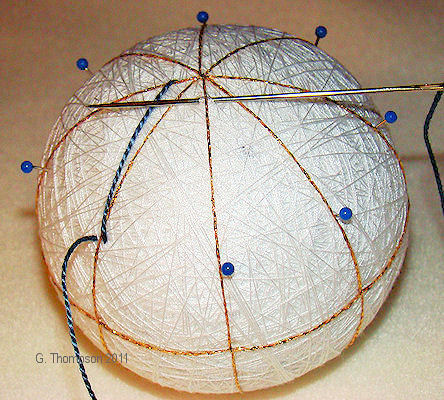 |
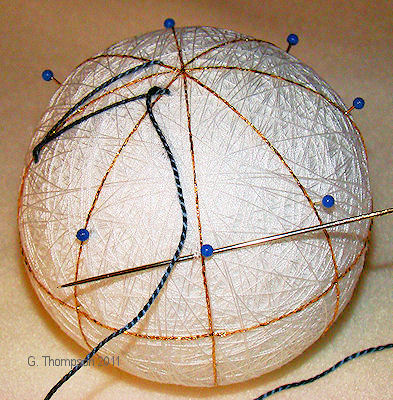 Move 1 line to the right, and take a small "top" stitch at the 5mm distance from NP (photo to left) Move 1 line to the right and take a "bottom" stitch (photo to right) |
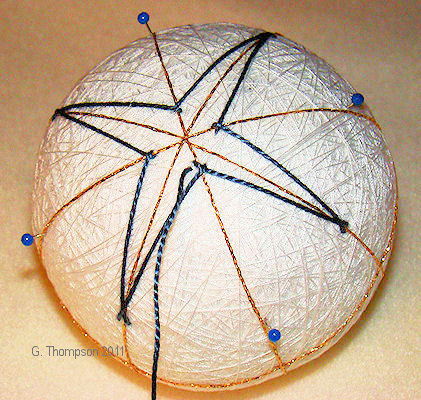 |
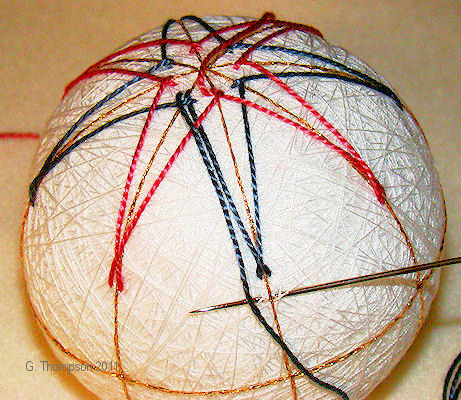
 Continue around in this zig-zag pattern until you return to the starting point. "Chidori" translates as "zig-zag". Park the thread. (Photo to left). Enter a length of Color B on a marking line that has a bottom stitch of Color A. Keep to the same 5mm distance from the NP. (Photo to right) |
 |
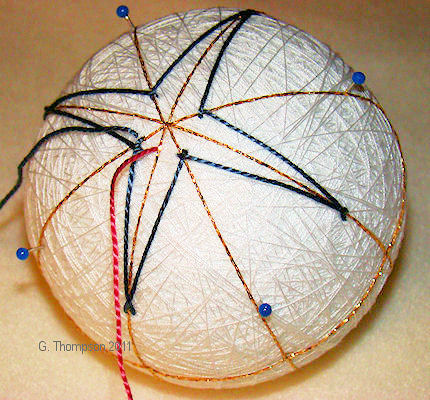
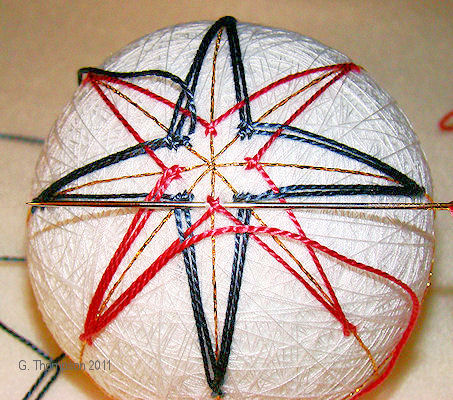
 Repeat the Chidori sequence around the mari, as was done for Color A. (Photo to left) Stop when you return to the starting point for this color. Complete the stitch but then allow the thread to "park". (Photo to right) |
 |
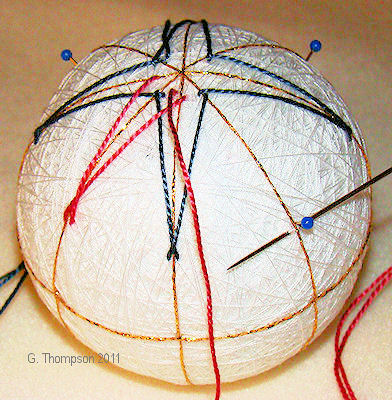
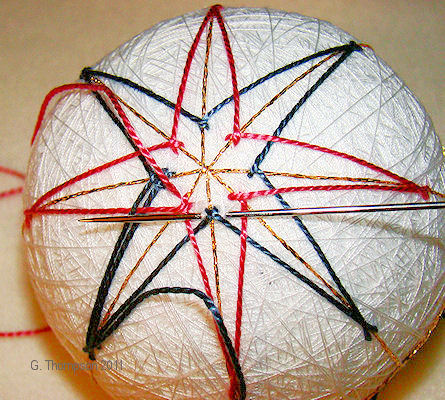 Return to Color A. Stitch a second row, laying thread parallel to first round. When taking bottom stitch, "stretch" stitch placement an extra 1-2 mm to allow for a smooth point. (Photo to left) When taking the top stitch, place needle about 1 thread width wider and below previous stitch. These top stitches widen as the pattern grows; they do not remain narrow. (Photo to right) |
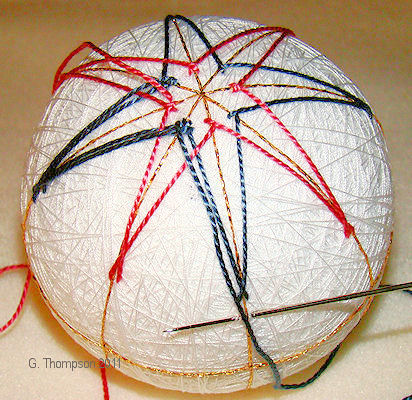 |
 Continue around the temari in this fashion, remembering to stretch the points. The working thread is always take over the previously placed threads before taking the top stitch. "Uwagake" translates as "over". |
 |
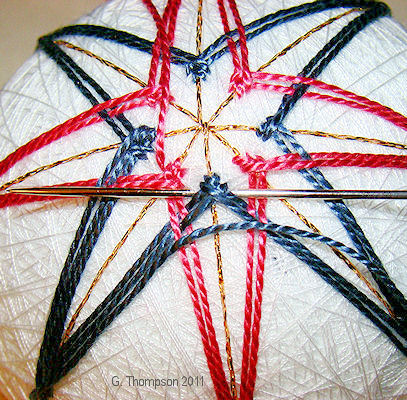 After completing the second round of Color A, repeat with Color B. Continue to alternate rounds. The top stitches will widen as they work downward. Remember to widen your stitch as you work downward. |
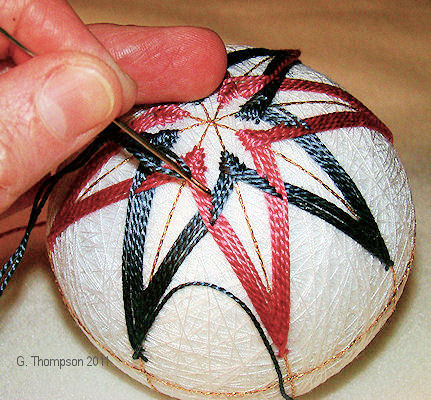 |
The threads of the 2 color sets will interweave with each
other, kousa
style. Use the eye of the needle to stroke this area
downward to keep stitching room open. |
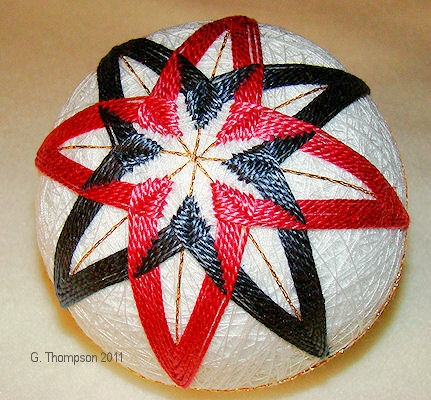 |
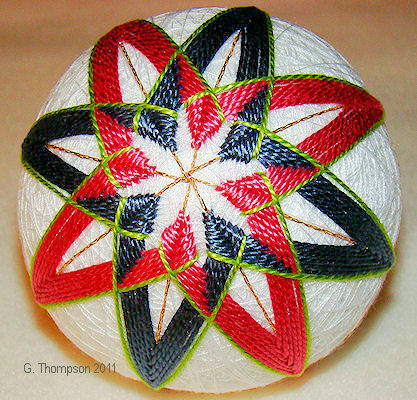 Work to the equator, using an equal number of rounds of each color. Notice the woven wedge created at the top because of placing the working thread "over" the previous rows before taking the stitch. Use a third color of thread and stitch 1 rounds both color sets if desired. This can also be worked in the same thread as used for marking the mari. Repeat the design on the opposite (south) pole of the mari. |
Last updated 1/2014 © 1998 - 2014 TemariKai.com, G. Thompson/PuffinStuff, Inc.