
Temari
Pattern GT11 / TemariKai
Simple Division Patterns
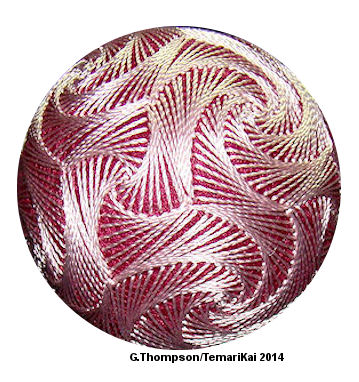
| Accomplished beginner to intermediate design. This is a traditional & favorite design, found in many sources; it's a classic interpretation of Uzumaki Kagari. Interpreted to easier format by Paula G., Anne W., Ginny T. Originally posted in 2003; compiled by Ginny T. | |
 |
Materials: 23 cm circum mari, wrapped in color of your choice.
Pearl Cotton #5 in color of your choice - plan on a full skein. Waste thread for marking. |
| The hint to remember for working the swirl is that while most temari depend on a round ball and precise markings before you even begin to stitch, this one is a forgiving on those but requires precise stitching. The diamonds and hexagons don't have to be spot-on, but your stitching needs to be crisp and precise for the best outcome. Placement and sizing of the stitches becomes very important. It may take a few practice runs to get the hang of it. Don't be discouraged if your first one doesn't come out "perfect". | |
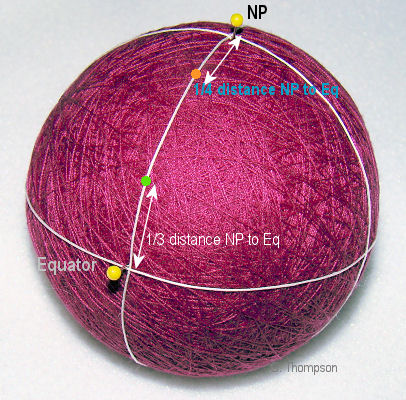 |
Using waste thread, mark a Simple/Vertical 4 division with an
equator. Tack the intersections but do so in a manner that will
be easy to remove later. Measure (either using paper strip, tape measure, or by eye) the distance from the NP to the equator. Determine 1/4 of this distance, and also 1/3 of this distance. Diamonds will be marked around each of the 6 poles of the S4 division using these distances as the axis (long and short) of the diamonds. The long axis is 2 x 1/3 of the NP-Eq distance and the short axis is 2 x 1/4 of the NP-Eq distance. |
 |
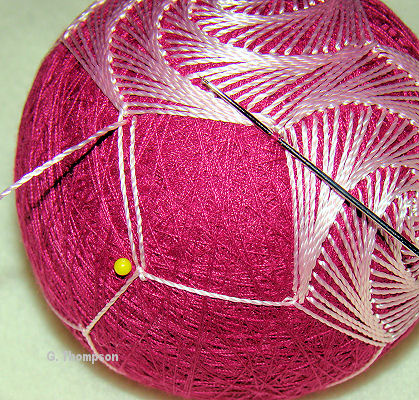
Place pins to mark the corners a diamond. The short axis is shown in yellow - corner pins are each 1/4 of the NP-Eq distance from pole (yellow pin). The long axis is shown in green - corner pins are each 1/3 of the NP-Eq distance from the pole (yellow pin). |
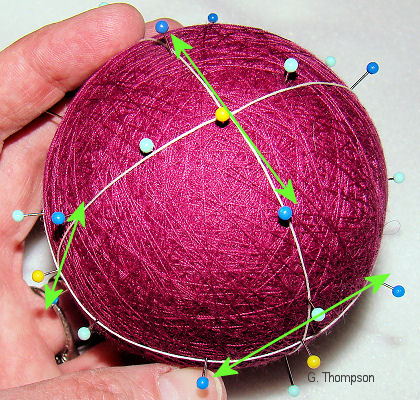 |
Repeat the pin placements to set up a diamond around each of
the 6 pole centers on the mari. As you proceed, be sure to alternate the orientation of the diamonds to be perpendicular to each other. That is, the long axis of one will be at right angles to its neighbors. The green arrows in the diagram are the long axis of the diamonds. |
 |
You have laid out six diamonds, alternating in orientation on
the mari using the simple 4 division lines. CHANGE TO STITCHING THREAD. Using the thread you will stitch the design with, outline the diamonds. Be sure to stitch AROUND the Simple division lines - not THROUGH them, since they will be removed later on and if you have stitched through them you are stuck. Take each pin out as you stitch and be sure to keep an eye on your tension - the threads need to lie smooth and flat without any "extra" in there to make them loose or wobbly. It's ok if the diamonds are not all perfectly equal to each other, but they should be in the ballpark. When you have outlined the diamonds, remove the Simple 4 marking threads. Be careful to not snip or remove the diamond lines. |
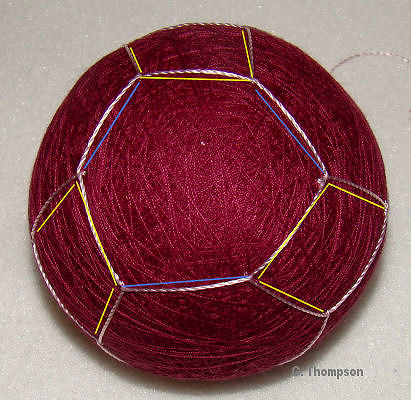 |
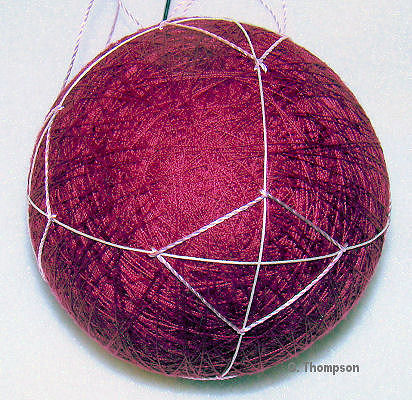
Laying adjacent to every 3 diamonds is a hexagon. The diamonds
each "provide" three alternating sides of the hexagon - using
your stitching thread, connect the diamond points on the
"missing" sides of the hexagons. The diamonds are highlighted in yellow in the photo; the other three sides of the hexagons are highlighted in blue. |
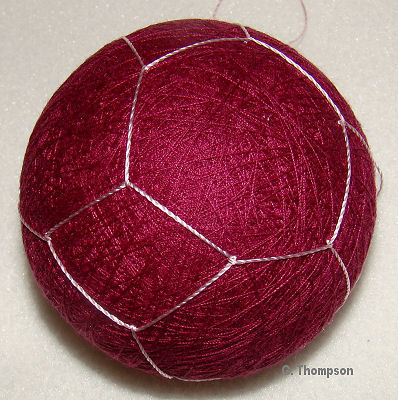 |
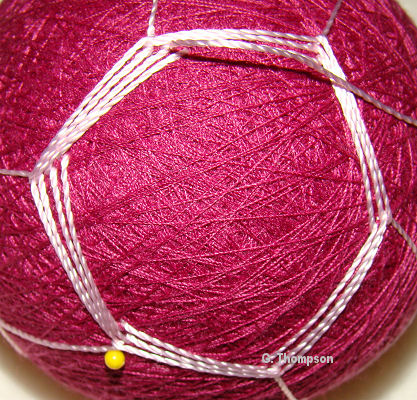
Again, pay attention to tension - don't kill it, but be sure
that things are smooth and snug. These initial diamond and
hexagon outlines form the first round of the design, so you want
the tension to match your stitching. When you are finished so far it will look like the photo at the left. Note that the hexagons will not be "regular" - that is, even sides all around - so don't worry. |
| While this swirl design is forgiving regarding the roundness of the ball, and the accuracy of the markings are, it does require neat and even stitch placement for the best outcome. It also usually takes working a few to really get the feel of it. The is stitching "off the grid" - that is, not around a marking line, so you will be gauging your stitch size and placement by eye. The "smoothness" of the swirl comes from the consistency in the stitch size and placement, and the "swirly" of the swirl comes from being sure that there is a constant connection in the design to the previous row. | |
| The swirl effect is gotten by stitching sets of lines as "sprays", working in a clockwise direction around the inside of the shapes that have been marked out. The overall swirl that you "see" when the design is complete is an optical illusion dependent upon the interaction of the diamonds and hexagons, so as you begin working the shapes it's not "visible". You'll see the overall design emerge as you continue to work it. | |
 |
The hexagons are a little easier to work than the diamonds, so start with those. Cut a working length of stitching thread, enter it and anchor it and come up tight in the corner inside of one of the hexagons. While learning you may find it helpful to place a pin at your starting corner - it really doesn't affect your stitching in any way but it might help to keep you oriented as you work the design, as you learn it. |
 |
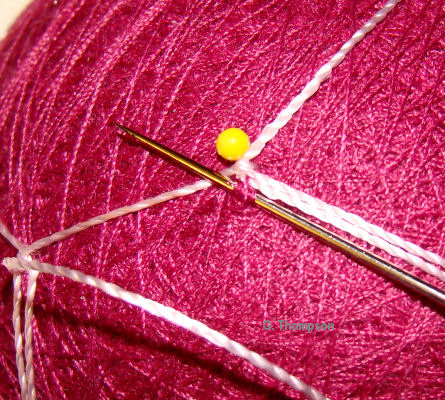
Within the hexagon, move one corner to the right/clockwise, and take a small - about 2 mm - stitch. Better design results are gotten by taking the first round stitch on an angle to the corner point, as though you were adding the base of the triangle formed by the two outer marking lines and the needle, will prevent the "gaps" that can sometimes happen at the outer round of a shape (if this does happen you can fill it in later). |
 |
 Now comes the important step to maximize the swirl appearance. As you complete the stitch, use the tip of your needle to be sure that you have adjusted the thread to come very close or touch the outer marking line. Guide the thread into place this way as you snug down the thread. |
 |
Move one corner clockwise and repeat. Notice that the thread
of the stitch we just finished touches the marking line thread.
(Remember, when we laid down the markings lines it was said that
the marking lines become the first or outer round of the swirl
shapes themselves.) Continue around the hexagon until you return to the starting point (pin) but do not take a stitch at that corner yet. |
 |
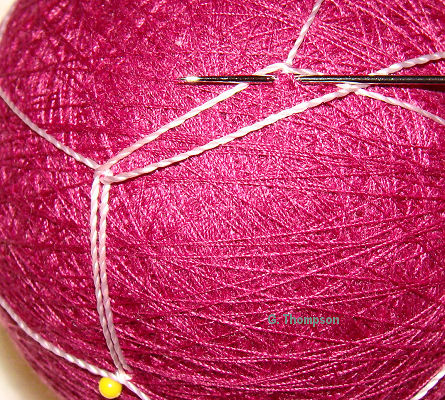
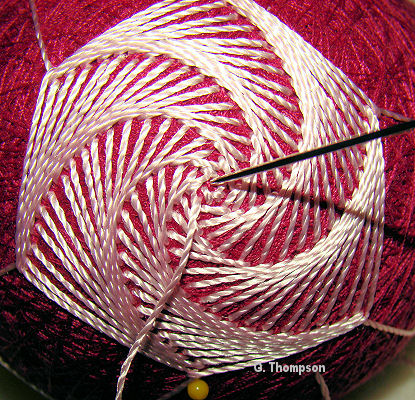
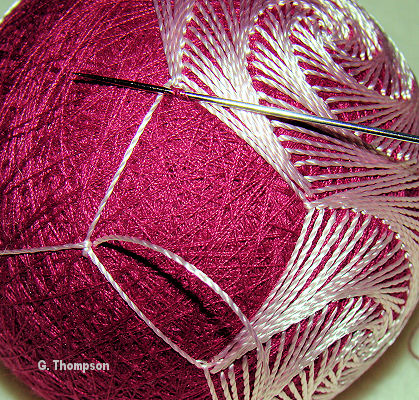
When you are back to the start of the round, it's time to adjust the angle of the stitch to what you will use from now on. Place your needle parallel to the thread from Round 1. Put the tip of your needle at the marking thread forming the side of the hexagon. Back off about 2 mm with the tip of your needle and take the stitch. You don't want to be "under" the thread of the previous round, just right next to it, and parallel to it. Placing your needle tip, backing off about 2mm and taking the stitch will help you keep all of the remaining stitches the same size... it gives something to guide you. |
 |
Remember to also "pull" the thread up with the tip of your
needle as you snug up the stitch as we did on round 1. Then end
of the thread should touch the thread of the previous round. Continue around the shape in the same manner. |
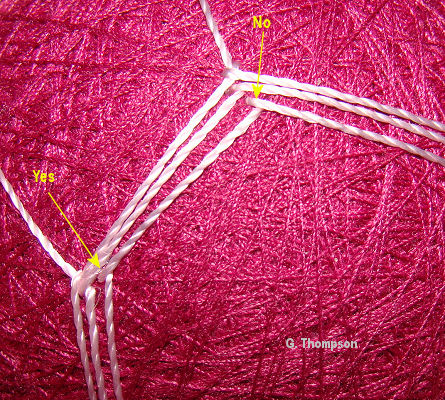 |
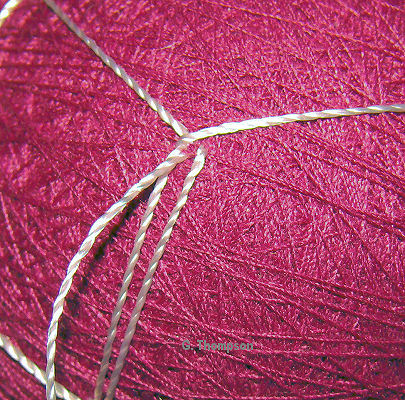
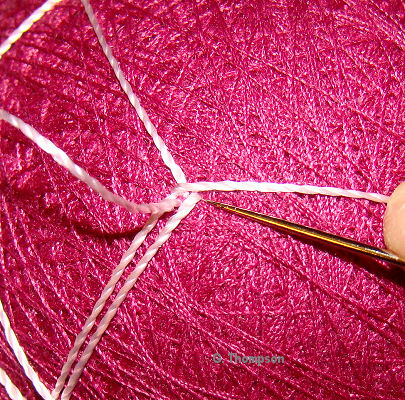
This photo shows what you want the lay of the threads to look
like. Notice that the start of the stitch that is correctly
placed touches or very nearly touches the thread of the previous
row. If you leave a gap or space between the threads, it will lose some of the flow and swirl effect when the design is complete. |
 |
Continue working clockwise around the hexagon and close into
the middle of the shape. The "sides" you are stitching will gradually become smaller as the swirl condenses into the middle. |
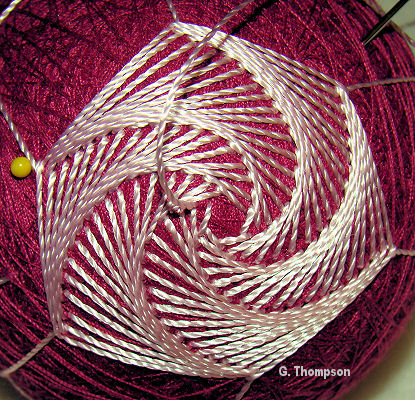 |
 As you stitch around the hexagons, they close in to the center. Adjust your stitch size to maintain perspective and neatness. Close up the center with tiny stitches and end the thread. |
 |
The diamonds are worked in the same way, but the angles are sharper and require a little more attention in th beginning to keep things neat. Tuck into the corners as closely as you can when you begin. |
 |
 Work the diamonds in similar fashion, closing into the center |

|
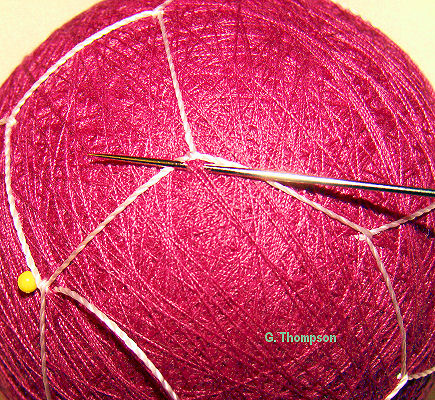
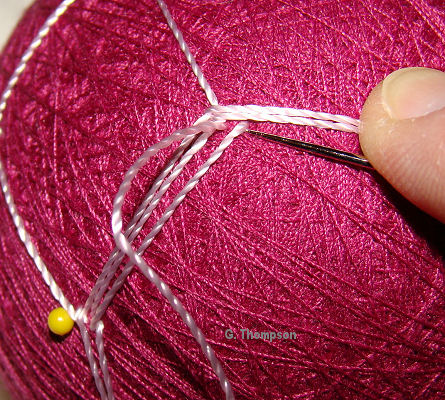
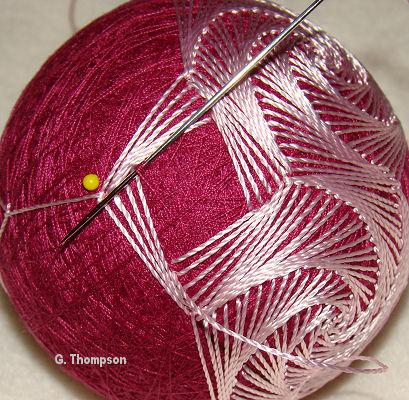
The actual overall swirl effect of the finished temari comes
not from the individual faces that you stitch but from where
they adjoin each other. Notice the diamond whose corners
are marked by the four yellow pins. Two sides of the diamond
adjoin one each of adjacent hexagons. It's this junction that
forms the "swoops" of the swirl that your eye is drawn to when
you look at the temari. |
| As you complete the stitching in
each face this effect emerges over the finished temari.
While hexagons and diamonds were used in this design, similar
effects can be had by stitching the line art technique in
other shapes. And, single shapes stitched with line art are also effective in many other designs, not just "swirls". The key is to keep the "contact continuity" where the lines spray out. Work each hexagon and diamond to complete the design. |
|
This is a TemariKai.com Printable Page; © 2014, all rights
reserved. Right click to print one copy for personal use.
Last updated 2/2014 © 1998 - 2014 TemariKai.com, G. Thompson/PuffinStuff, Inc.