
Temari
Pattern DA04 / TemariKai Simple
Divisions Patterns
| Intermediate design, Interpreted from Tanoshii Temari Aso / Fun with Temari, pg.5 ball #6. Originally posted 2005; contributed by Debi A. | |
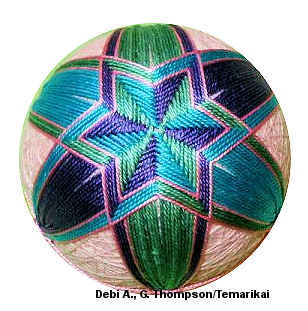 |
Materials: 23 cm circum mari, wrapped in pink Pearl Cotton #5 in green, purple, blue. Plan to have a good amount of thread. Metallic thread to match the mari wrap. |
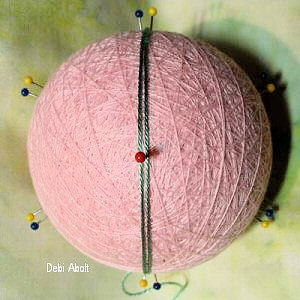 |
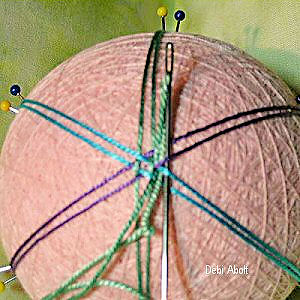
1. Mark a Simple 6 either just with pins, or invisible
(matching the mari) thread. 2. Decide on a sequence for your three design colors. Remember to use the same sequence throughout. This is both a layered and woven design so the consistency of stitching sequence will make a difference. For this temari the sequence was green, blue and purple. 3. Wrap one round on each side of the pole pin with the first color (green), crossing between the keeper pins at the equator. |
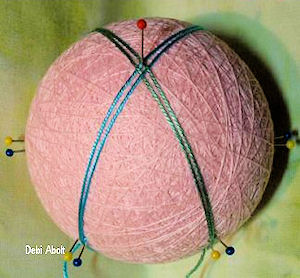 |
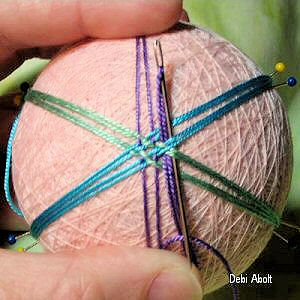
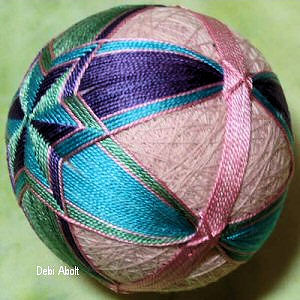
4. Move left to the next set of pins to wrap the next color (blue). Notice the weaving in the picture, when you are on the right of the N pole pin you will go over the first green thread and under the second. Proceed to the opposite keeper pins on the equator and cross over so you will come up on the left of the South Pole pin, again going over the first green thread and under the second one. Continue your wrap back to the starting place on the equator, then wrap again, this time on the left of the NP pin and weaving opposite. Do the same for the SP pin. |
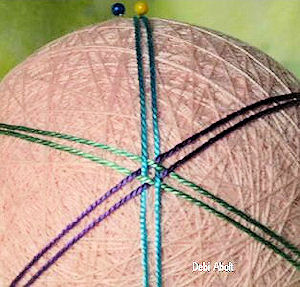 |
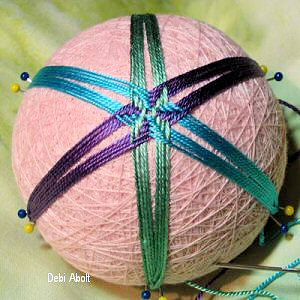
5. Move to the left for the last set of keeper pins and your last color (purple). Notice that at each side of the pole the purple must pass 4 threads...2 green and 2 blue. Always go over the first thread, under the next two and then over the last thread. Complete one wrap on each side of the pole, crossing at the equator. |
 |
 6. For the next rows you will be keeping to the same color sequence, wrapping once to each side of the pole on each round. Notice that you are always passing 4 other sections as you go over the pole. For all colors, go over the first section, under the next two (which are becoming interwoven) and then over the last section. Continue until you have the desired number of rows (9 in this example). |
 |
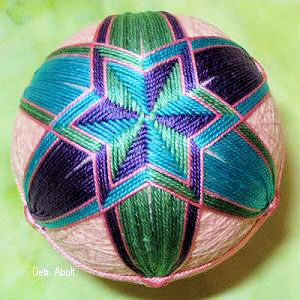
By the time you have 3 or 4 rounds done you should be seeing
the star pattern emerge. Continue for another 3 or 4 rounds. |
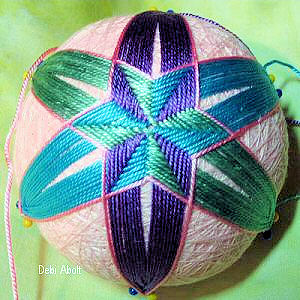 |
7. Wrap one round of metallic or contrasting color (pink) on each section, continuing to wrap them in the same order to maintain the weaving pattern. |
 |
8. For the next collection of rounds you will do a different color on each section...the sample did purple on the green section, then green on the blue section, and then blue on the purple section. Note that the order you stitch the sections does not change when you shift the colors. (That is the green section is still wrapped first but with purple thread this time.) Do as many rows as desired (3 in the sample) then finish with another contrasting row on all sections. |
 |
9. Wrap the obi over the bundles at the keeper pins. In the example the obi was a bit wide so X stitches were added over the bundles to make sure it didn't slip. |
This
is a TemariKai.com Printable Page; © 2014, all rights reserved.
Right click to print one copy for personal use.
Last updated 1/2014 © 1998 - 2014 TemariKai.com, G. Thompson/PuffinStuff, Inc.