
Temari
Pattern JZ18 / TemariKai
8-Combination Division Patterns
| Intermediate to advanced design; interpreted from Zoku Kaga no Yubinuki to Hana-temari-cho / Thimble Ring and Flower Temari Vol.2 ISBN 978-4-8377-0114-9, pg. 6; contributed by Joan Z. This was offered by Joan as a TalkTemari StitchAlong in July 2014. | |
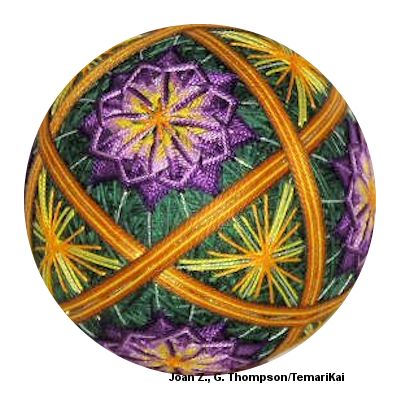 |
Materials: 39 cm mari, wrapped in dark green Pearl Cotton #5 in thread colors your choice: four flower shades of one color (very light or white, light, medium, dark) 2 shade of an embellishment color, 3 wrapped band shades of one color (light, med, dark) Marking thread in thin light gold or silver Prepare an 8-Combination Division |
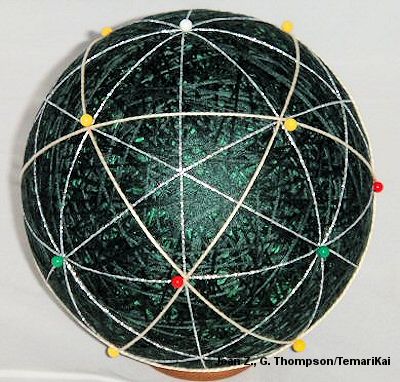 |
Mark a C8, but remove only the 4 pins around the equator that
are the center of the 4 8-part squares. Add extra guidelines by
anchoring marking thread at the equator with a remaining equator
pin. Wrap a guideline over 2 halfway pins across to the opposite
equator pin, over 2 halfway pins and back to starting pin. Pivot
thread and repeat. Repeat (the "X-wrap guidelines") at the 2nd
set of equator pins. At this point you should have a 14-face
marking made up of 6 squares and 8 small triangles. Second
set of extra guidelines: Add guidelines in the 6 squares to make
16 part squares. Groom and tack the centers of the 6 squares and
the 8 triangles. |
 |
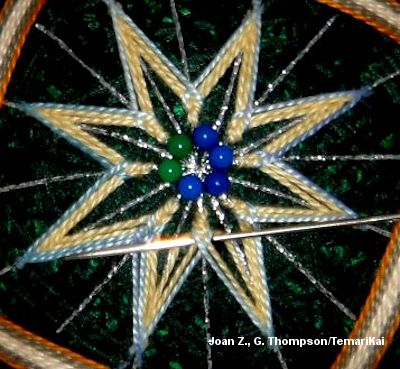
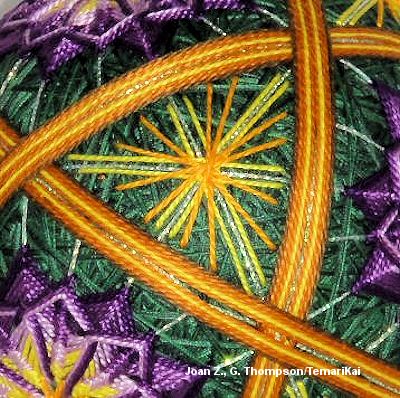
Wrapped bands with kagomi / basket weave. Wrap is done along side first set of extra guidelines; it outlines the 6 squares and and 8 triangles. Locate spot on the marking where 2 small triangles meet nose-to-nose at 3 o'clock and 9 o’clock (indicated by the button in photo to left). If you follow the guidelines that outline the sides of the 2 triangles you will see they make a low broad X. Using medium shade of wrapped band color, anchor the thread at the cross point of the guidelines along side the left down guideline (on a low wide X the left down wrap always passes UNDER right down so by anchoring at that spot the start will be hidden.) Wrap the following rows on both sides of the guideline: 1 row of medium, 1 row light, 2 rows medium, 1 row dark on each side of the guideline. Repeat until all the small triangles are outlined on all 3 sides in a basket weave pattern. |
 |
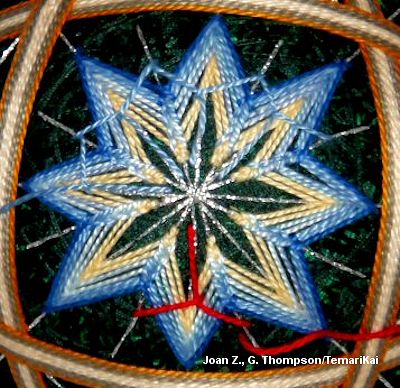
Read through all the directions on how to stitch the
flower motif before starting. The basic stitch is Uwagake
Chidori Kagari for the first three rows. Beginning
with Round 4, work sujidate
uwagake kagari as described below. The 4th row is
where the ribbed adaptation starts. Using the flower color
the shading sequence will be: 2 rows lightest, 2 rows light,
2 rows medium, 1 row dark. |
| Hint: Start stitching at petal bottom point, it will make the ribbed effect easier to stitch. Work in this manner when adding or changing threads as well. Take the pole stitch as close to the flower center as possible; this will give a small tight circle in the middle of the flower motif and as much room as possible for design rows. If a spacing pin is needed to keep the center stitches even, use a 5mm or less distance. Stitch 3 rows of Uwagake Chidori, normal method, in colors indicated above. Beginning with Row 4, instead of passing the needle over all the previous rows, pull the bottom 2 rows down and stitch over only the last 2 rows. Continue stitching under only 2 rows for all remaining rows. If this is difficult, use pins to hold the rows in place so that stitches can be taken more easily. There will be a small gap between the rows; this is normal with this stitch variation. | |
 |
For the second layer of the motif a circle of blanket
stitches is used. Place a pin between each flower petal as
close to the last row as possible; push the pin all the way
in so the stitch will need to be taken below the pinhead.
This gives the stitch a tiny bit of space to pull up without
distorting the first layer of your flower. Anchor a working
length of the medium shade of the flower color thread at a
pin. Insert the needle between rows 2 and 3 just to the
right of the the guideline that the petal tip was stitched
on. Carry the thread under the thread wrap and bring it up
just to the left of the first row of uwagake chidori. Bring
thread down and pass the needle under the top stitch to form
a blanket stitch. Pull the thread snug but not so tight it
distorts the stitch. Start the next stitch at the next pin
to the right and repeat until you come back to the starting
point. The blanket stitch pulls your stitch into a nicely
shaped petal. |
 |
Second and 3rd rows: Change to dark flower color. Start at petal tip. When inserting the needle between rows 2 and 3, insert it 1mm further away from the center of the petal. This will keep the second layer thread from widening the small gap between the rows. Bring up the needle near the center of the flower, to the left of the previous row and at the flower tip; pass the thread under all previous rows of blanket stitch before taking the next stitch. |
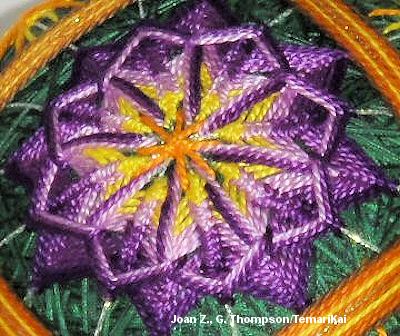 |
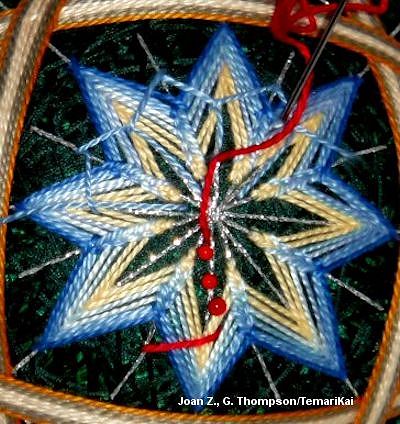
The photo to the left is a close up of the finished flower motif. Work Matsuba Kagari in the center of each motif to complete. |
 |
With darkest embellishment color use straight stitches to outline the 3 guidelines inside the 8 small triangles. Change to lightest color and work Matsuba Kagari inside the 8 triangles. |
This is a TemariKai.com Printable Page; © 2015, all rights reserved. Right click to print one copy for personal use.
Last updated 2/2015 © 1998 - 2015 TemariKai.com, G. Thompson/PuffinStuff, Inc.