
Temari
Pattern JZ14 / TemariKai
8-Combination Division Patterns
| Intermediate to advanced design; personal interpretation of traditional design. Originally posted in 2011; contributed by Joan Z. | |
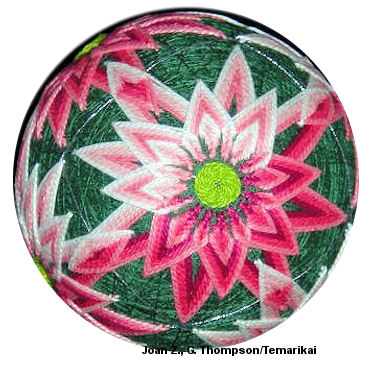 |
Materials: 30 cm circum mari, wrapped in dark green Pearl Cotton #5 in yellow-green, maroon, dark pink, medium pink, light pink and very pale pink (or white) Marking thread in fine metallic Prepare an 8-Combination Division |
 |
|
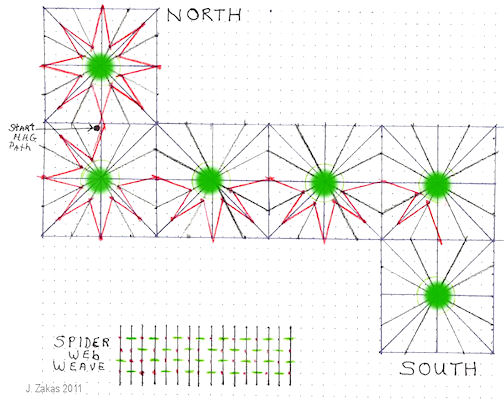
| Add extra marking lines to create 16-section squares, as show in the above diagram. With yellow-green pearl cotton, stitch a round center using the diagrammed Spider Web Weave in the center of each of the six squares. After completing row 1, avoid going over and under the same guide lines as the row before by going under 2 guide lines in a row (see Spider Web Weave diagram). Make the centers as large or small as desired. |
| Start with darkest color and stitch a
renzoku/HHG
path using Uwagaki
Chidori Kagari, from north to south (see diagram).
On the way back from south pole use medium pink. Stitch 2 rows
each way then change to dark pink for the north to south path.
Change to light pink for the South to North path. Stitch 2 rows
each way then change to medium pink for the North to South path.
Change to very pale pink for the South to North path. Stitch 2
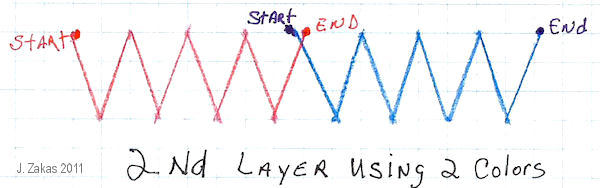
rows. Stitch a second layer of Uwagaki Chidori Kagari in each of
the six squares. Use the same color sequence as you did for the
HHG path changing the color of your thread as you proceed around
each kiku motif. To change colors as you go, start stitching up at the center (cone) first and continue around until you come to a color change. End your thread at the center stitch then start your next stitch where you ended. This will give the cone part of your stitch two colors. See diagram below for illustration on changing color. Stitch 6 rows to finish the temari. |
|
 |
This
is a TemariKai.com Printable Page; © 2014, all rights reserved.
Right click to print one copy for personal use.
Last updated 1/2014 © 1998 - 2014 TemariKai.com, G. Thompson/PuffinStuff, Inc.