
Temari
Pattern JZ10 / TemariKai 8-Combination
Patterns
| Intermediate design; Originally posted in 2004; contributed by Joan Z. | |
 |
Materials: 24 cm circum mari, wrapped in white Pearl Cotton #5 in 3 shades of 3 colors of your choice plus white Marking thread in metallic gold Prepare a 8-Combination Division |
 |
| Take 2 color pins to represent one of your chosen color
families. Locate a pole on the C8 and place a pin than place the
same color pin in the pole directly opposite. Move to an
unmarked pole and repeat for the remaining 2 color families. All
tsumu kagari/spindles
are stitched 2 rows at a time. You will need to stitch the poles
in the same order. Which individual spindle you stitch doesn't
matter as long as you stitch all 4 of that color before moving
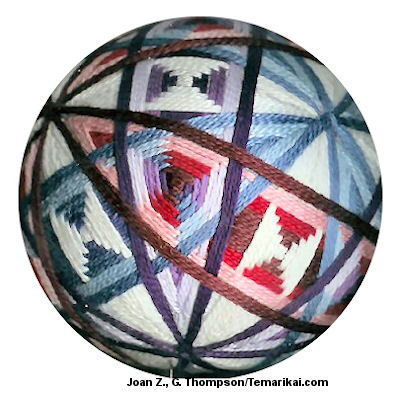
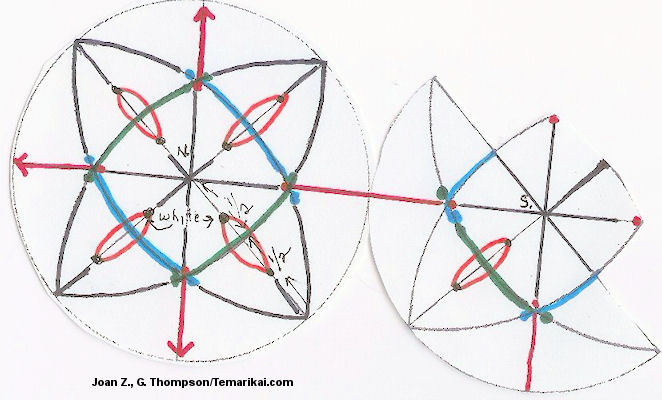
to the next color. 1. LONG SPINDLES (3 color spindles) Choose a north pole to begin stitching. Look along the corner line until you come to the center of a triangle where 3 lines intersect. Using your darkest color start the tsumu / spindle just on the north pole side of that line and continue along across the equator until you come to the next triangle intersection and end the spindle just inside the south pole side of the intersection. See the red line in the picture. Repeat around the pole, 2 lines on each spindle. Change colors choose another pole for north and repeat with the 2ND dark color around the pole. This spindle will cross the first at the triangle intersection. Repeat for your 3rd dark color |
| 2. SHORT SPINDLES (white) Around each pole will be 4 intersections that cross at the straight line. Measure half way between the pole and the intersection and mark with a pin. Do this on both sides of the line at all the intersections around the ball. Stitch spindles around the marking pins. Note: I measured down from the poles the same distance around the whole ball. Ex: if you're halfway measurement is 2cm measure 2cm down from every pole around the ball. This will insure that both ends of your entire group of short spindles will reach it’s poles on the same round. Repeat the steps 1 and 2 all around the ball being careful to stitch all the long spindles before going to the next round of short spindles. WORK THE SHORT SPINDLES ALL THE WAY TO THE POLES. STOP THE LONG SPINDLES when there is only enough room at the points for 4 rows of your pearl cotton. NOTE: How many total rows you have will depend on the size of your ball. I had 7 with my long spindles and 5 with my short spindles. The color order for the long spindles is: 2dk, 3md, 2lt. 3. THE WRAP For this step you will wrap an outline around your long spindles using the darkest color. Anchor your wrap thread at the pole and place 2 keeper pins at the 2 poles. Start at the North Pole and wrap around the ball CROSSING OVER at the poles. Repeat until all 4 spindles are outlined. Tack the poles. Repeat until all long spindles are outlined and the poles are tacked. |
This
is a TemariKai.com Printable Page; © 2014, all rights reserved.
Right click to print one copy for personal use.
Last updated 1/2014 © 1998 - 2014 TemariKai.com, G. Thompson/PuffinStuff, Inc.