
Temari
Pattern GT53 / TemariKai
8-Combination Division Patterns
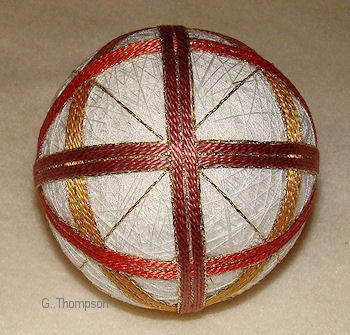
| Accomplished beginner design; personal composition. Originally posted in 2010; contributed by Ginny T. | |
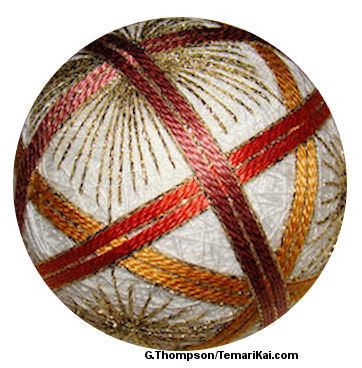 |
Materials: 25 cm circum mari, wrapped in white Pearl Cotton #5 in three colors Marking thread in metallic gold Prepare an 8-Combination Division |
| This is a maki kagari design, created to be a teaching and demo project. It combines the wrapped bands and matsuba kagari. The goal when stitching Maki Kagari is a very smooth final appearance, such that you almost cannot tell where the thread starts and stops. The key to this to blend the entrance and exit points of the working thread into the band as much as possible. In order to do this, always have your needle going in the same direction the thread is traveling/wrapping around the ball as you enter and exit the mari base. The closer you can keep your needle parallel to the orientation of the band, the better your smoother the band will be. | |
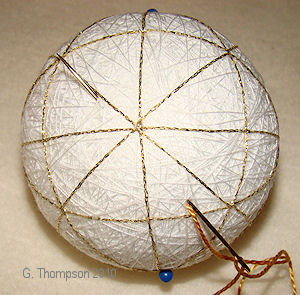 |
 Place NP and SP pins. Measure off 3 wraps plus enough to anchor and exit of one color of pearl cotton. Anchor the working thread of the first color and bring the needle up just adjacent to a diagonal marking line in one of the squares formed by the C8 marking. Bring the needle through and notice the thread is laying in the direction of wrapping. This is one key to a smooth band. |
 |
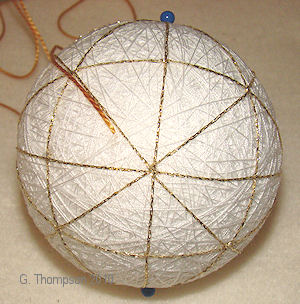
Wrap the thread around the mari 3 times (remember, it's a 6-thread band; 3 threads on each side of the marking line). The red pin shows the starting place for this wrap set. When you are ending the set, carry the needle a few mm past the starting point, and also pass the needle into the mari base on the same path as the thread has been wrapped. The needle should always be more parallel than angled to the threads. This is the second key to a smooth band. Bring the needle up on the opposite side of the marking line, just adjacent to the line. |
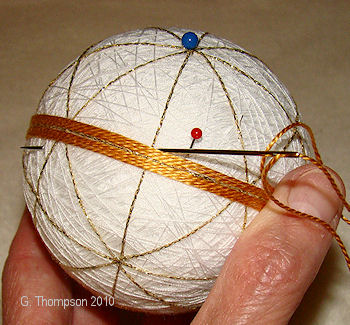 |
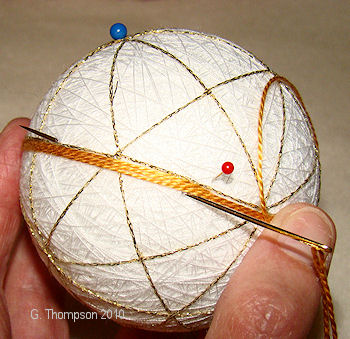
 The red pin now indicates where the thread was entered to start the second set of wraps. Again, the needle is carried a few mm beyond the starting point before it's entered into the mari to end off the working thread and completing the pearl cotton wraps. Notice also that the needle is being roughly directed along the thread wrap path to keep the start/stop blend as smooth as possible. Add a row of metallic gold on either side of the band, and repeat on the other diagonal. |
 |
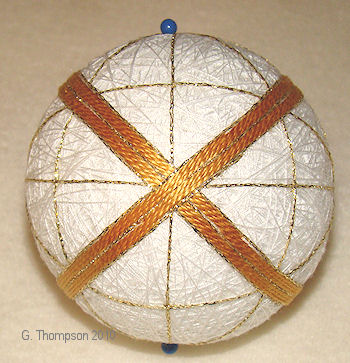
After completing the first set of 2 bands, hold the ball with
the top/bottom pins at the top and bottom (!) and rotate the
mari 1/4 turn (2 vertical marking lines). Repeat the procedures for wrapping 2 more bands, again on the diagonal of the square of the face that is towards you, using the middle color . |
 |
There are now 2 sets of bands that are at right angles to each other relative to the design. They will form the outline of the square formed by the division face at the top (north) and bottom (south) poles of the mari, with the 8 lines of the C8 pole centered in the square. Your top and bottom pole pins should be in the center of these squares formed by these 2 sets of bands. |
 |
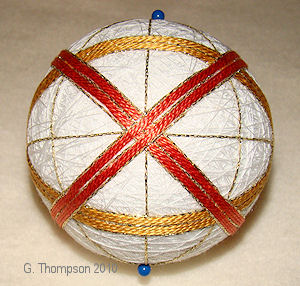
Using the third color, wrap 2 more bands using this set of lines - the bands will go to/over the middle of the sides of the square, NOT to the corners. |
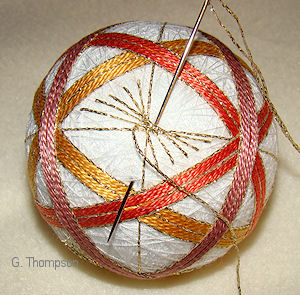 |
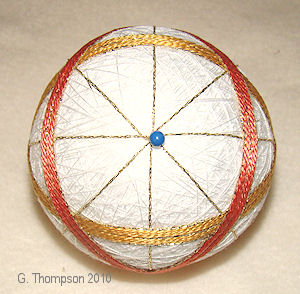
 Work Matsuba Kagari (Pine Needle Stitch) sprays in the four diamonds that travel around the equator of the temari. When working matsuba kagari it is important to keep working across the stitching field, going back and forth to the starting points rather than moving a small distance to one side. Keeping the needle going in the opposite direction of the stitch will give clean, crisp end points on the stitches. Stitch another set of Matsuba Kagari in the opposite side of the diamond, and tack the center. Repeat in the remaining 3 diamonds around the equator of the temari. |
 |
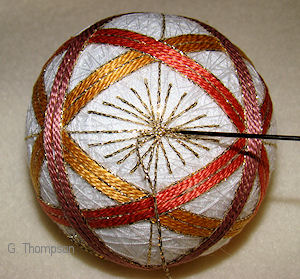
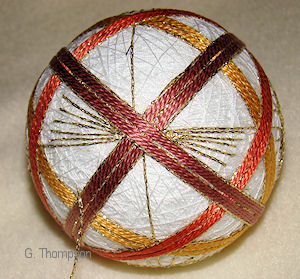 Matsuba kagari is also worked in the top and bottom squares. Rather than tacking the centers, the thread must be passed under the intersection of the two bands crossing at the poles. Bring the thread up and carry the needle to the corner of the bands and marking line. Enter the needle very close into the corner. Pass under the bands and exit the needle very close to the corner on the opposite side of the intersection. Repeat in remaining sections, and repeat the process on the opposite pole to complete the design. Refer to the completed photo for reference. |
This is a TemariKai.com Printable Page; © 2014, all rights reserved. Right click to print one copy for personal use.
Last updated 1/2014 © 1998 - 2014 TemariKai.com, G. Thompson/PuffinStuff, Inc.