
Temari
Pattern GT57 / TemariKai
10-Combination Patterns
| Accomplished intermediate to advanced design; traditional design learned in JTA classes, originally taught & posted in 2007 by Sue H; re-posted in 2011 by Ginny T. | |
 |
Materials: 24 cm circum mari, wrapped in navy Pearl Cotton #5 in red and ecru (full skeins) Marking thread in metallic gold Prepare a 10-Combination Division |
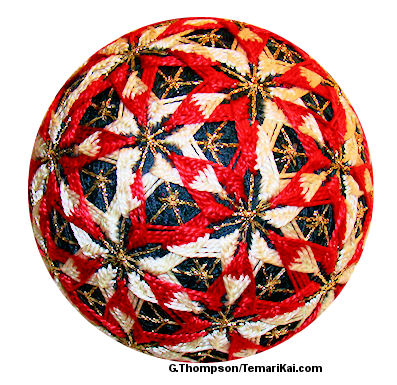
| The Hito Hude Gake design is a traditional Japanese design, and was brought to us by Sue H., having learned it while in Tokyo from Ozaki Sensei. Over the years we have updated the written directions for it, with this being the latest re-write. HHG takes its name from "one stroke" in brush painting; the brush is placed on the paper and not lifted until the entire design or calligraphy character is completed. In Temari, it means that one thread defines a design in a similar way. if this design were worked in one color, it would be one continuous thread; here it is split as one color thread traverses from north to the south pole, then a thread of a second color traces back from south to north to complete the motif. The path, however is continuous. | |
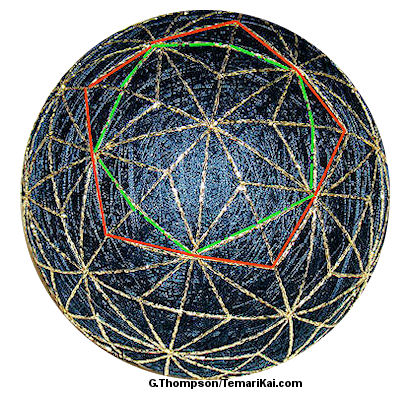 |
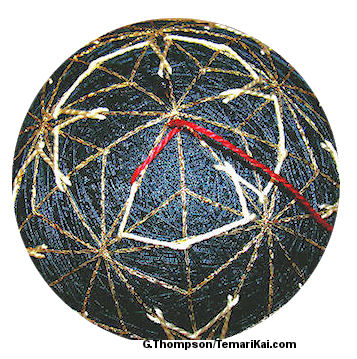
Add extra marking lines as outer, off-set pentagons around
each original pentagon center. The outer corner of the off-set
pentagons extend 2/3 (on smaller mari it can be 1/2) the
distance out on the short leg of the marking into the adjacent
pentagon. See diagram at left: Green broken line indicates the
original pentagon center outlined by the C10 division marking.
Red solid line indicates the added marking line. Repeat around
each of 12 centers on the mari. Tack the 12-line
intersections. Place a north and south pole pin, and maintain
N-S orientation for working this design. |
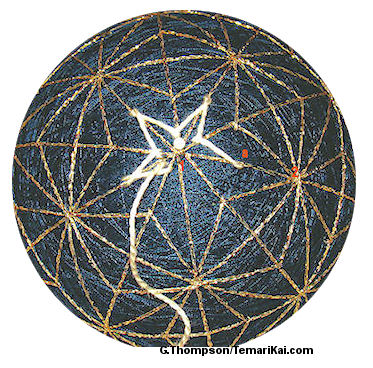 |
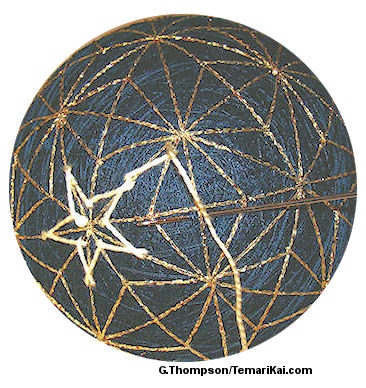
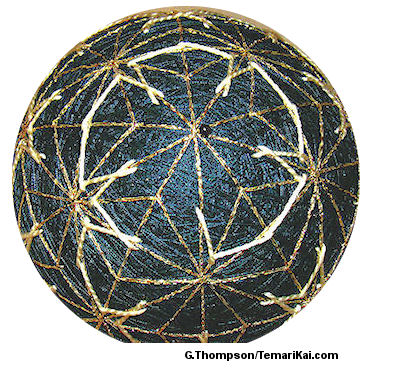
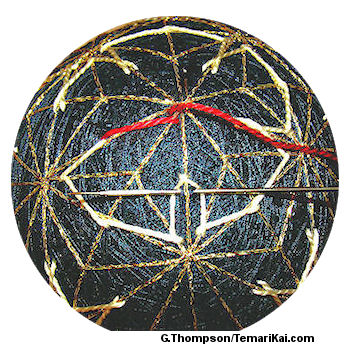
The design will form as chained uwagake chidori stars, with 20 6-point stars circling the 12 5-point stars in the C10 centers.They are "chained", and will spiral around and down the ball to the south pole; the return thread will complement the first as it comes back up the ball to the north pole and complete the star motifs. Begin at North pole with one color. Enter thread in a long diamond, 1/2 distance of long axis, to left of marking line (pt "a" on line 1-2). Stitch a basic chidori kagari star, placing top points close to center, and bottom points continue to be 1/2 distance of long axis of diamond. |
 |
Continue around toward the the starting position. Rather than completing the usual bottom point, take what will from here on be known as a "transition" stitch, as shown at left. (Please note that "transition stitch" is not a traditional or authentic teaching, but rather a term that I and several others use to describe the process of carrying the thread (transitioning) from one section of the design to the next, which is a common action in these types of designs). Hold the ball with the long axis of the diamond in a horizontal position, and take a small stitch just above and parallel to the marking line, directly above where the thread was entered to begin the design. As mentioned, it is 1/2 way between centers. |
 |
The transition stitch sets up the path up to move to the adjacent (12 pt) center. Stitch an uwagake star as before, but this one will be a 6-point. Bottom points are again 1/2 the length of the diamonds, which means stitch just below the short horizontal marking line. As the design is worked, some diamonds will have only a long axis, and some will also have a short axis as marking lines. Bottom point stitches are always at the halfway of long axis, and just below the short if there is one. Center points are the same as the previous star and will be the same in all 5 and 6 point stars, close to the center. |
 |
Continue until the star approaches the transition stitch. When
you have come to the last bottom point that you can stitch on
this star, it requires another transition stitch. Again, it is
positioned midway along the length of the diamond, taking the
stitch just above the marking line. If there is a vertical
marking line in the diamond as there is here, take the
transition stitch around it. (It will vary whether there are one or two marking lines in each diamond. Just maintain the 1/2 positioning, either way.) |
 |
After taking the transition stitch, work uwagake for the star
again until the last empty diamond, and take another transition
stitch. Note that each star will have a varying number of points being stitched before a transition stitch is required. This is characteristic of the pattern and how it should be. The remaining points will be filled in with the opposite thread coming up from the south pole and is what makes the "magic" of the design. |
 |
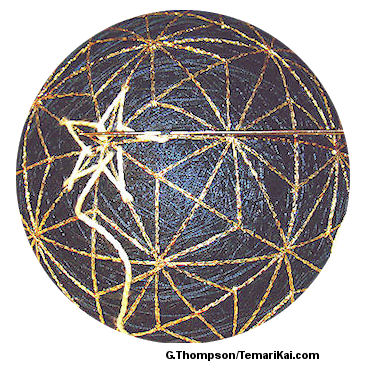
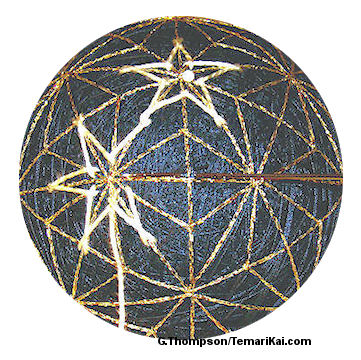
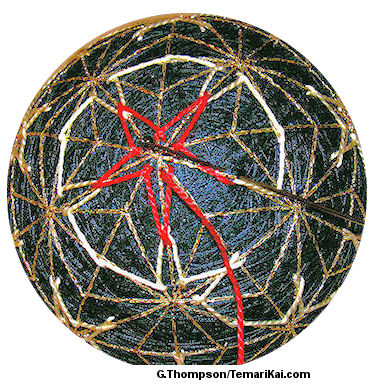
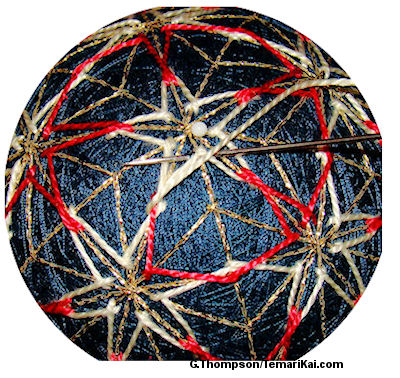
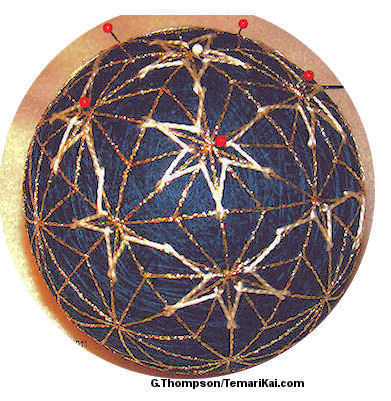 Continue in pattern. Notice how the stars are tracking around the north pole. As the pattern progresses, the stars will track around the mari, and also begin to work down toward the south pole. The red pins show the stars around the north pole (with white pin). |
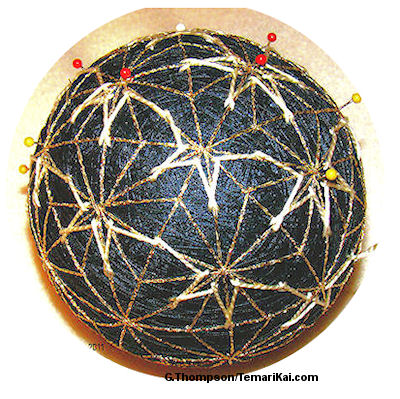 |
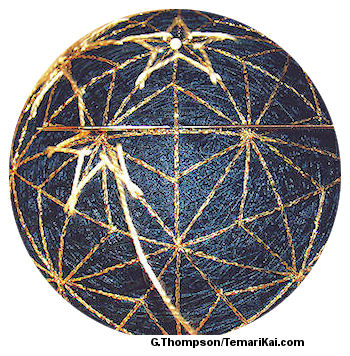
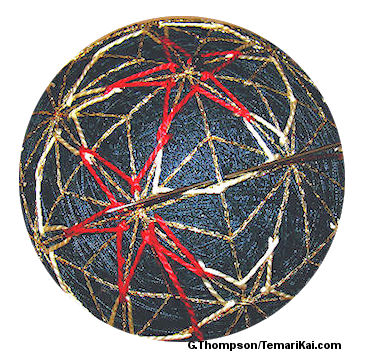
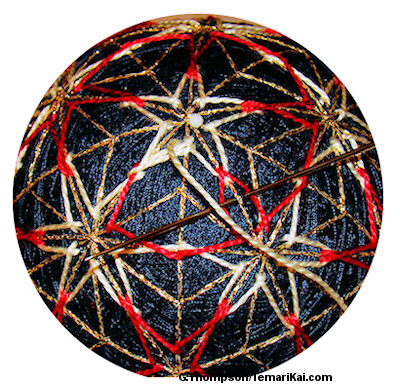
 The yellow pins show the next level "down" as they track around the ball. Continue to the south pole. As you reach the south pole, end off the thread as shown to the right. It is to the left of the marking line, 1/2 the distance of the length of the diamond. |
 |
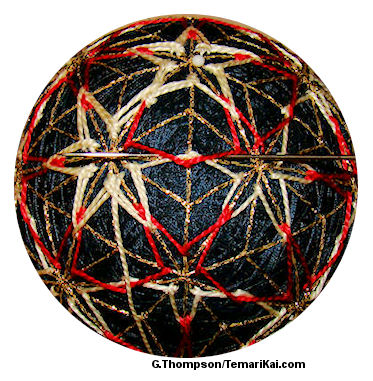
 Enter the second color thread as shown at the south pole, just where the first, north pole color thread was ended. Begin working an uwagake chidori star. The bottom points of all of the uwagake chidori stars will be stitched in kousa (interwoven) style. The stitch is carried below and placed in between the threads of the point of the previous round - see photo, right. Be sure to stretch the points in all ensuing rounds to assure a smooth lie of the threads. |
 |
 Continue around the star, and when you return to the origin, begin transition stitches. As previously done, the stitch is taken above the horizontal line, and now they will be immediately above the transition stitches of the first round. Continue working in the same manner, and you will find that the stars are being completed by this second round. |
 |
When you have returned to the starting place at the north
pole, end off the second color thread as though it were the
first half of the transition stitch. |
 |
 Enter a length of the first color thread as though it were the second half of the transition stitch, and continue working in pattern. You are back to working what is now the second row of the first color, going from north pole to south pole. Top points of the stars are worked in traditional uwagake chidori stitch. Bottom points are worked in kousa style. |
 |
For this and all ensuing transition stitches - stitch just
above the marking line but below thread rounds. These stitches
will become longer and longer with each round as the points
grow. Remember that these transition stitches are the bottom
points of stars, and need to be stretched as any other point
stitch. Maintain normal tension for appearance but do not pull
them too taut or the threads will bunch and not lie flat. |
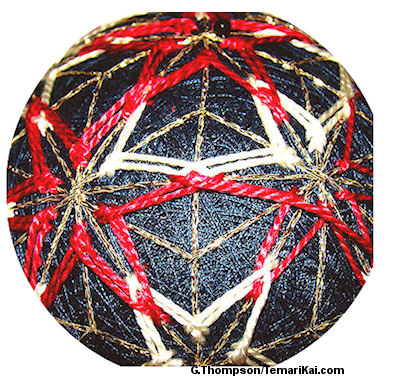 |
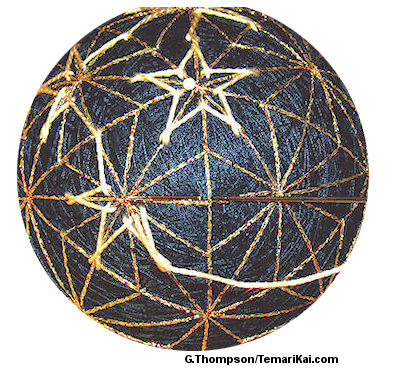
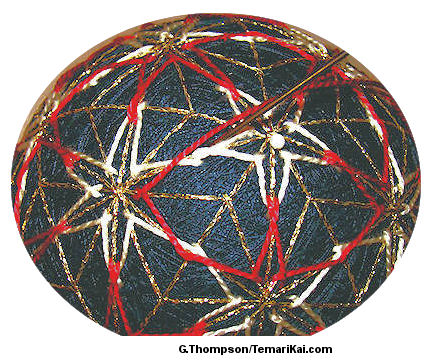
As you work more rows, be sure that the threads of the
transition stitches cross in the center. You'll notice that this
forms a vertical interweaving of the threads, rather than the
horizontal appearance of the regular kousa style points. The
color divisions within the uwagake stars is the essence of this
application of the design. Continue repeating rows until a
pleasing balance is achieved for the size of the mari. It
usually takes at least 3 rows for the design to fully develop
and have desired depth of appearance; the larger the mari, the
deeper the design will need to be worked. Usually little embellishment is needed, since it's the color contrast that makes the design. Small matsuba / star burst stitches can be added in the open areas if desired. |
This
is a TemariKai.com Printable Page; © 2014, all rights reserved.
Right click to print one copy for personal use.
Last updated 1/2014 © 1998 - 2014 TemariKai.com, G. Thompson/PuffinStuff, Inc.