
Simple / Vertical Divisions - Jiwari :Marking Lines
After the pins have been placed to divide the mari, the next step is to lay down the marking lines. It's important to remember
 common sense
and to not over-think things. It's also important to lay the lines
accurate and purposefully, not just let them trail along after the
needle. Tack stitches
need to be neat and clean. Division/marking
lines most often are worked with metallic thread that becomes an
integral part of the design (there are exceptions, of course) - this
example is using pearl cotton #5 in order to give clear illustrations.
common sense
and to not over-think things. It's also important to lay the lines
accurate and purposefully, not just let them trail along after the
needle. Tack stitches
need to be neat and clean. Division/marking
lines most often are worked with metallic thread that becomes an
integral part of the design (there are exceptions, of course) - this
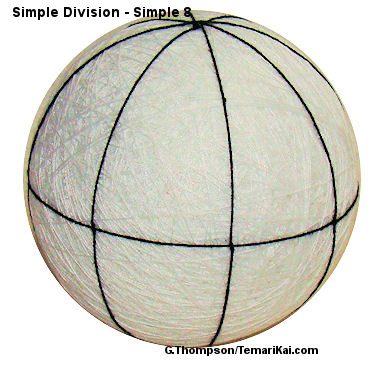
example is using pearl cotton #5 in order to give clear illustrations. The Simple/Vertical division divides the mari simply, or vertically, into wedges (any number; this example is for a Simple 8) from north to south (like an orange), with a perpendicular equator at the mid-line. Remember that as you place the lines to help you stay oriented.
This example uses a Simple 8, but the same process is used for laying down jiwari for any division. Pass the thread to the same side of the pins as you lay them down. Be precise in placing the threads, be sure to check they are in the proper place before tacking, don't remove any pins until that point is tacked, and keep the tacking stitches small, neat and efficient.
Marking lines are often metallic threads that become an integral part of the temari design. Pearl cotton is being used here in order to provide easier illustration.
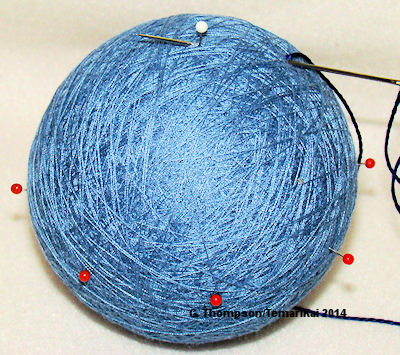 |
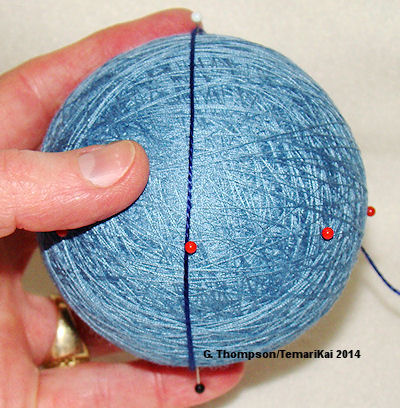
Measure the thread by wrapping 4 times around the mari, and then adding some extra to enter and exit the thread). Cut from the skein; anchor the thread and bring the needle up at the NP pin, pull through. |
 |
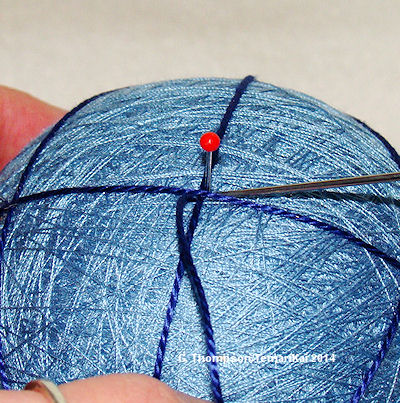
Wrap the thread from the NP to one of the equator pins (it doesn't matter which one to start). Notice that the thread is being kept to the left of the pins. It's important for accuracy to stay to one side or the other (just choose one and keep to it). That being said, IF a pin is slightly off kilter and you need to pass to the other side to keep the thread straight, then do so. The important thing is to keep the lines straight. |
 |
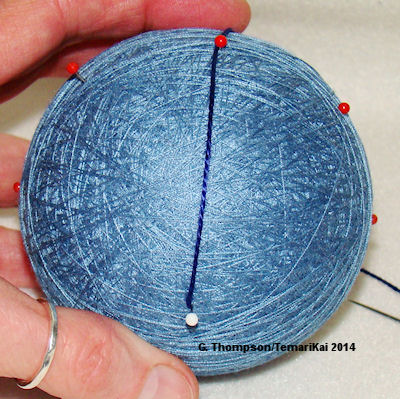
 Continue wrapping to the SP pin, keeping to the same side of the pins. Keep on going past the equator pin on the opposite side of the mari to the one first used, then back to the NP pin (photo, right). Notice that the thread wrap completely circumscribes the mari, essentially dividing it in half. This is the requirement for a division line. All division lines are marking lines, BUT not all marking lines are division lines. |
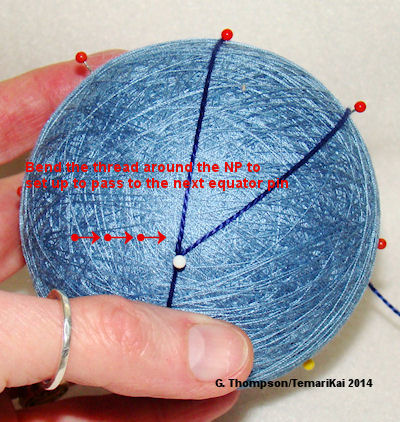 |
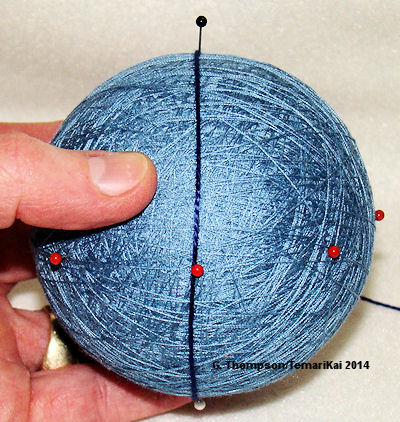
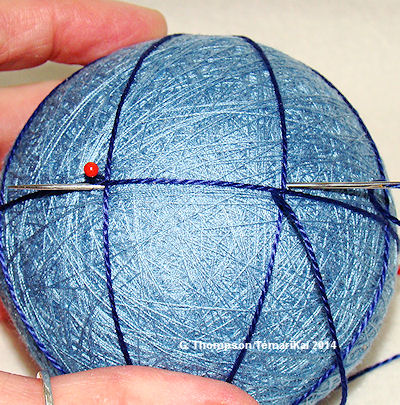
 Partially pivot the thread around the NP pin to move to the next equator pin. Wrap in the same manner as the first pass, progressing from NP to equator to SP to opposite equator, to NP pins. |
 |
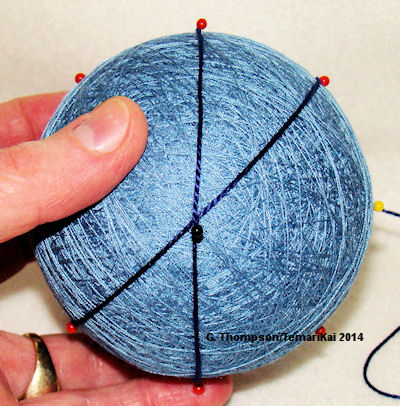
Repeat these steps until all pairs of equator pins have been
used, pausing at the SP pin on the last wrap. Notice that the
threads all pass to the same side (the left, in this example) of
the marking pins, they have been laid straight and true, and are
not flopping around. Don't over exert on tension, but it should
be tight enough that the threads stay in place and lay flat on
the mari. |
 |
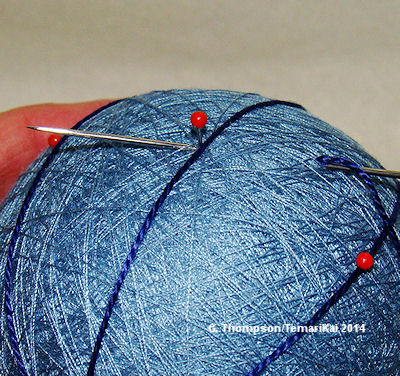
 On the last wrap, when at the SP, take a small tack stitch to secure the threads and pole in place. It should be small and neat. Take a tiny bite of the mari wrap, don't just pass under the marking threads. Remove the pin as you complete the stitch and adjust the tension accordingly. |
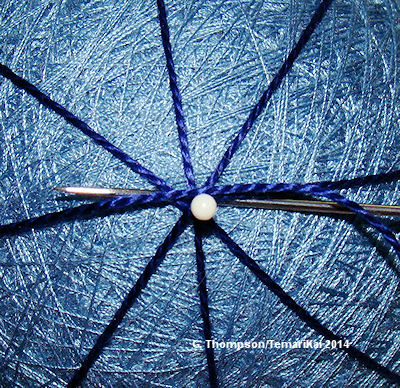 |
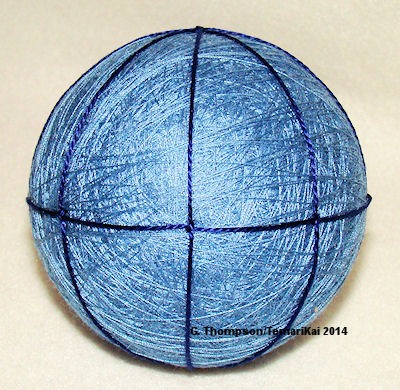
Complete the vertical marking by returning to the NP. Again, take a small tack stitch to secure the threads in place. Remove the pin as you complete the stitch. Anchor and exit the thread, trim off excess. |
 |
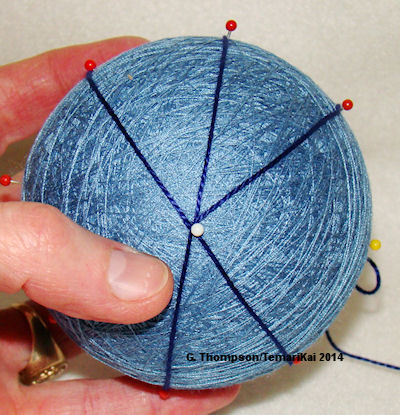
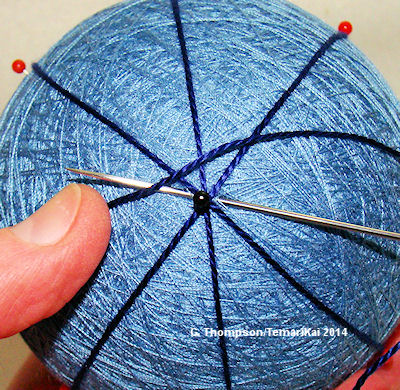
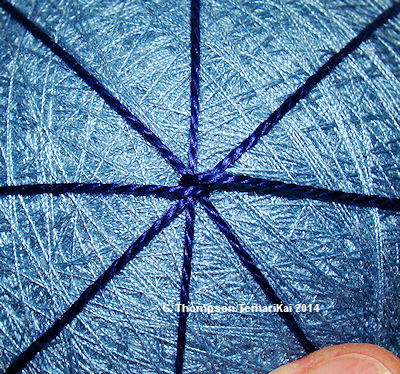
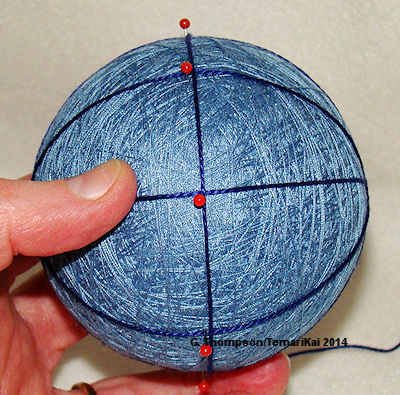
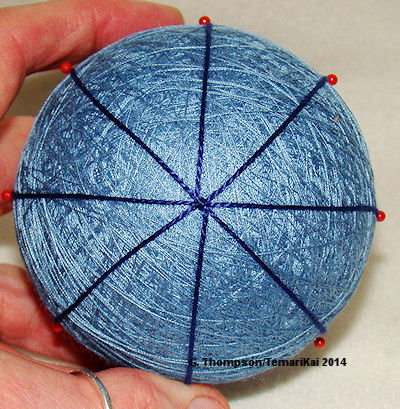 The mari now looks like this - 8 vertical lines running from NP to SP, and the pins still in place around the equator line. When viewed from either pole, there is a center point with 8 lines converging in the middle - this is an 8-point center. |
 |
Measure off 2 wraps around the ball plus a bit more to enter and exit the thread. Anchor the thread and bring it up at the intersection of any one of the equator pins and a vertical marking thread. |
 |
Wrap the thread around the mari, keeping it aligned against the equator pins. Be sure that the vertical lines are also in place and not getting skewed from handling the ball. |
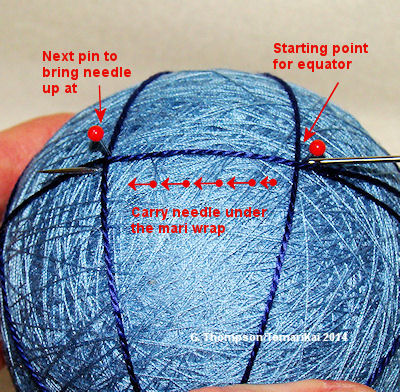 |
Insert the needle to the right of the marking line where the equator wrap began. Run it under the mari wrap and bring it up one equator pin to the left. Notice that the needle is coming up in the lower left corner of the perpendicular intersection of the vertical line and the equator line. Before placing the stitch, be sure that the threads are aligned at the pin and have not shifted. |
 |
 Take a small tack stitch diagonally from where the thread comes up in the lower left to the upper right of the intersection. Run the needle to the next equator pin to the left, carrying it under the mari wrap as was done previously. Remove the pin as you complete the stitch. Continue this process around the equator until back to the starting point. Anchor and exit the thread, trim off excess. |
 |
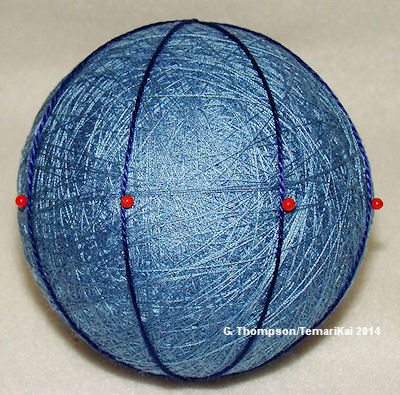
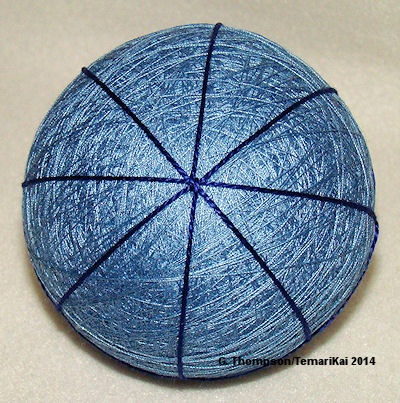 The Simple 8 division and marking is complete. Notice that the side views show 8 equally sized and spaced wedges around the mari. The poles each show 8-point centers. It is a 3-dimensionally symmetric division. If a wedge were to be cut out, each one would be identical, and when replaced in any order form the complete ball again. Either pole can be chosen as the north or south pole to orient polar designs. Additional 8-point centers can be combined or added on to the Simple 8 to form an 8-Combination division. |
This
is a TemariKai.com Printable Page; © 2014, all rights reserved.
Right click to print one copy for personal use.
Last updated 1/2014 © 1998 - 2014 TemariKai.com, G. Thompson/PuffinStuff, Inc.