
Seed Stitch
Seed Stitch is one of a few Western stitches that has found its way into common use in temari making. You'll see it incorporated in various designs in Japanese books, both as a main element, or as an embellishment. Its English name has been adopted as the working
 Japanese name.
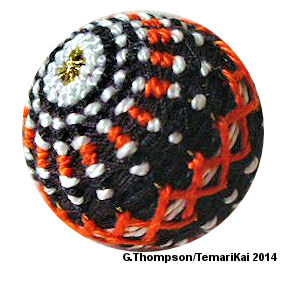
A seed stitch is simply a small back-stitch. That is, the stitch work progresses left to right, rather than right to left as most others do. It generally is worked across a marking line. The stitch itself is easy; it's the alignment of the lines and precision of the stitches that contribute to its success. As seen in the photo to the right, it can be worked densely as shown at the pole of this example (which is actually a teenie sized temari, about 1 inch), or with more negative space visible. If stitches are worked in a color that matches the mari wrap, various areas of "floating" color can be achieved. The stitch is named for resembling a small seed, but it is also visually similar to a seed bead. The same type of beaded designs can be worked on a temari if the proper support grid of marking lines is laid down.
 |
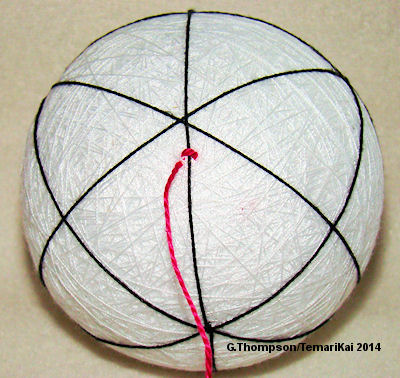
Anchor and enter a working length of thread to the left of a marking line. Seed stitches should travel straight down the marking thread, so bee sure to check and correct the alignment of the marking threads before stitching around them. |
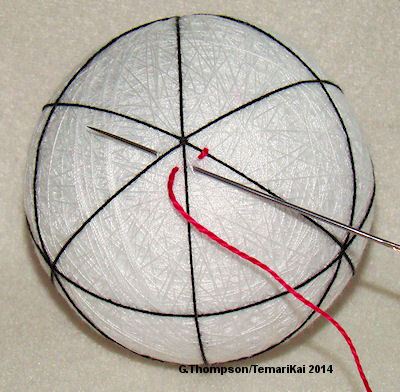 |
Take a small stitch (kagari) over the marking thread, from
left to right. Insert the needle into the mari wrap and carry it
under the wrap to the left of the next marking line to the left. The stitch should lay
perpendicular to the marking line - not on an angle - when
complete. Note that the thread exit on the left of the marking
line and the needle entrance to the right of the marking line
are on a horizontal orientation. Repeat these steps, traveling to the left, until you return to the starting position. |
 |
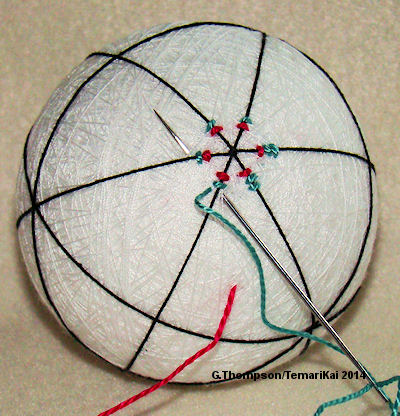 For the next row, anchor the next color (or bring the existing one up) about 1 thread width below the first/last round. Repeat as above, placing the the stitches so that they just touch the round above it. There should not be open space between the rows. |
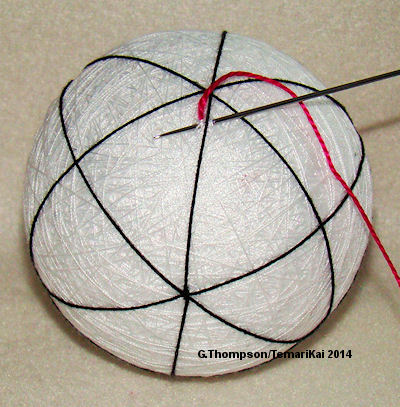 |
 Note that the stitches are done one row at a time around the full set of marking lines - not down one line at a time, as shown here. These photos show how the different orientation of the needle, if stitched down the line, affects the stitch, so that it loses the perpendicular set to the marking line. This will result in very wobbly lines of stitches. The needle always has to be oriented on the same path you need the stitch to follow, whether here in seed stitch or any other stitch. |
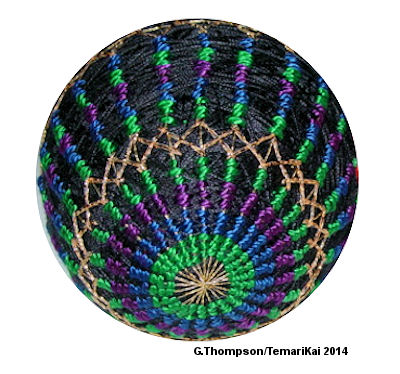 |
Seed stitch can produce some very enjoyable designs. The higher the degree of the Simple division, generally the more pleasing the design. It's often combined with rows of chidori kagari, as seen in the example to the left. |
This
is a TemariKai.com Printable Page; © 2014, all rights reserved.
Right click to print one copy for personal use.
Last updated 1/2014 © 1998 - 2014 TemariKai.com, G. Thompson/PuffinStuff, Inc.