Using Musical Mari Bases
Perhaps the one exception to making the dodia mari in the traditional manner are the musical mari bases that are available from Japan. These are hollow Dylite® poloystyrene (similar to Styrofoam® but a bit stronger and smoother) balls that are die-cut to house a pull-string music "box" platform. The balls are 38cm in circumference (about 4 ¼" diameter), and come in a variety of Japanese and Western tunes. The are most easily obtainable through Ai's Store (I have no financial connection with Ai).
The mari come with a hardware kit that is assembled to the ball PRIOR to wrapping it (see photos below). In addition to adding the hardware, it also help to "prime" the music box before doing anything else. Place a small mark on the string where it exits the mari. Hold the mari tightly with one hand and gently but firmly and smoothly pull the string to its fullest extension (usually about 40-45cm) - until you feel the resistance at the end, but don't over do it. Allow the music box to play to completion; it may "stall" as it gets close to finishing. Repeat the process until the cycle plays through completely and the string has returned fully to its starting position (as shown by the mark you placed on the string. This allows the string and spring to get into "synch" with each other, and makes sure that the string is winding smoothly on the mechanism.
Wrapping a pre-formed, solid base is a bit more challenging that making a traditional mari. Pay extra attention to placing the wraps in random fashion on all layers. It helps to use both thick and thin yarn, and then thread since you must create the stitching surface as well as cover the base. Make sure as the wrapping progresses that the mari is being maintained round. Remember of course, that wrapping the base will increase its overall size slightly, but don't over do it. Most importantly, you'll be wrapping around the hardware - the hanging loop at the top, and the tube that protects the pull-string at the bottom. Just be patient and don't try to hurry the process. Wrapping larger mari can be difficult on the hands - they are harder and more clumsy to hold since they are larger than most people's grip. You may find that a small pillow on your lap may help.
Depending on your stitching style, you may need to remember that you cannot plunge the needle as deeply into the mari as you might otherwise. The music box is deeply seated in the shell so there is no danger of damaging it, but your needle will probably not forgive you. Likewise you'll need to be a bit more careful with pins.
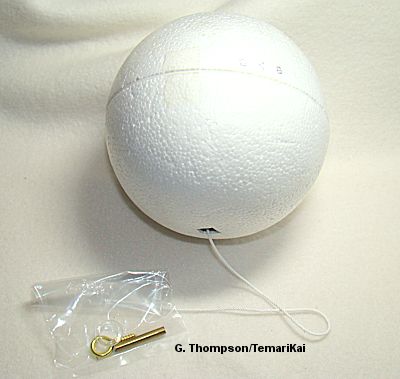 |
The musical bases come with the music box already inside the base, and the string coming through the square hole in the bottom. There will be a hardware packet with a screw eye, small brass tube, and a small plastic ring. |
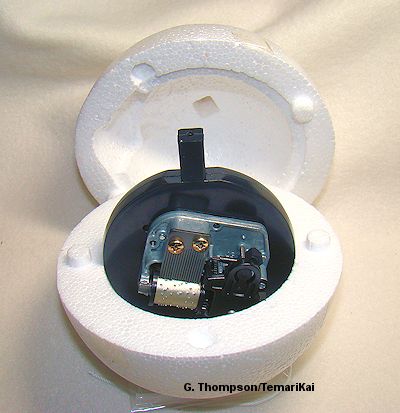 |
The ball is split around the equator, with a die cut seat for the music box platform, and holes at the top and bottom for anchoring pegs. There are also 2 sets of plug fittings to seat the 2 halves of the ball together properly. |
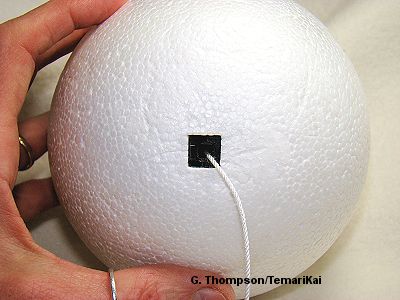 |
The music box platform has two extensions that go through the ball. The bottom one is where the pull-string emerges. The hole in the extension is square and un-threaded. It should be relatively flush with the base when assembled correctly. |
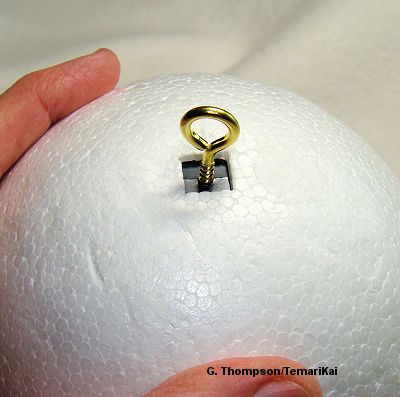 |
The top extension has a round, threaded hole. Insert the screw-eye and turn it until it's almost flush to the ball (no more threads showing). This is for hanging, and becomes a permanent part of the finished temari. |
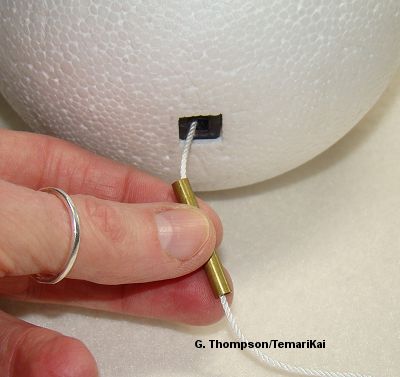 |
Slide the brass tube over the end of the pull-string and all the way up to the ball. |
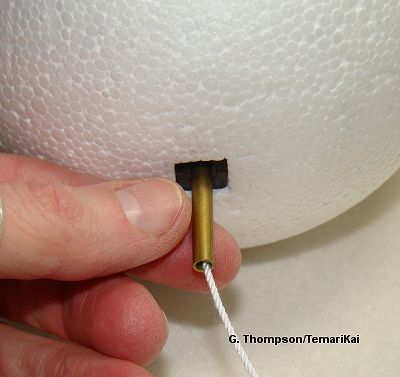 |
Insert the tube firmly into the hole in the bottom extension of the music box platform. About 1.5 - 2 cm will still extend beyond the edge of the ball. This protects the pull string and allows smooth operation of the music box after the mari is wrapped and stitched. It becomes a permanent part of the completed temari.A tassel or other decorative embellishment may be used around it if desired. |
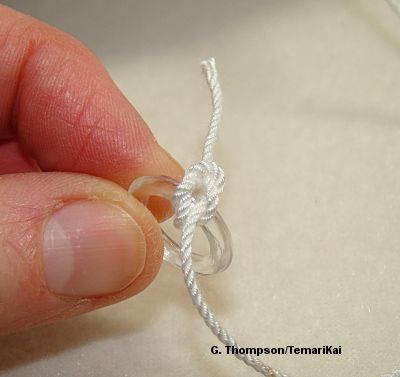 |
Tie the small ring to the end of the pull-string. Another type of end finish may be used. |
This
is a TemariKai.com Printable Page; © 2015, all rights reserved.
Right click to print one copy for personal use.
Last updated 1/2015 © 1998 - 2015 TemariKai.com, G. Thompson/PuffinStuff, Inc.
