
Threading a Needle/Anchoring the Thread
As mentioned in the "Little Things" essay, the most wonderful temari design can be undone by not paying attention to the finer points of stitching. It's also important to note that embroidery is different than sewing. Sewing is functional - it needs to be durable. Embroidery is decorative (usually). Certainly in temari-making it is, and it puts a little different spin on how thread is anchored in place when starting and ending a stitching sequence.
Before the thread can be started, the needle has to be threaded. With very few exceptions, this is most easily done by reversing the thought: needle the thread. Always begin with a freshly trimmed clean end on the thread (that means a quick snip at the end). If using a thread (more usually specialty threads) that can fray or twist badly, something like Thread Heaven (a thread conditioner widely available) is a great help; just follow package directions (and one cube will last a very, very long time). In general though most threads and especially pearl cotton don't need any extras.
 |
Cut a working length of thread (what ever is comfortable for you, but generally arm's length is common), and be sure to have a clean cut at the end. Sharp scissors are a must. |
 |
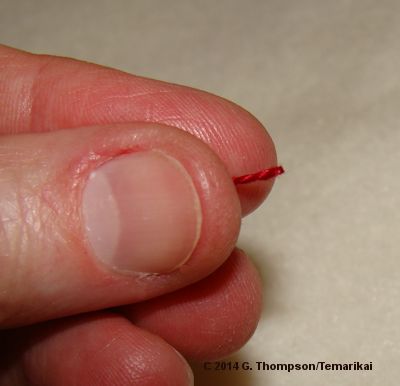
Place the thread between your thumb and index finger, with the end tucked in snugly between your fingers. Squeeze your fingers closed over the thread end. |
 |
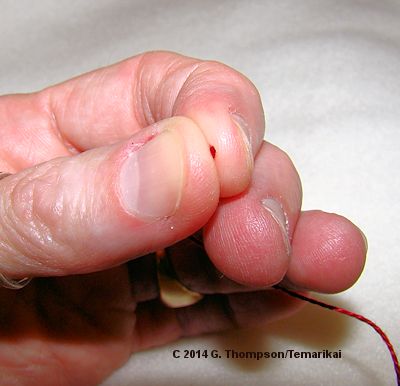
Bring the eye of the needle to your fingers, and slowly open them as you continue to gently push the needle eye against the thread. The end of the thread will skip easily into the eye, without having to "aim" in mid-air, or having the end of the thread "wilt" as you push against the needle trying to get the end of the thread into the eye. |
|
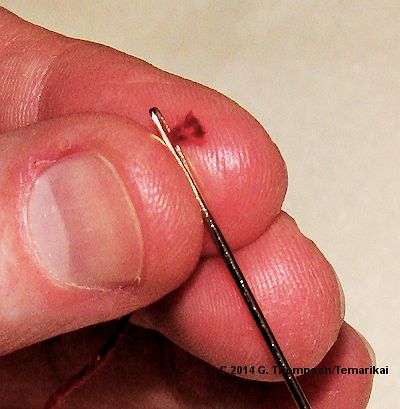
Continue to gently move the thread through the eye as you further open your fingers; when there is enough to grasp then just gently pull the length through the eye a short distance to obtain a working configuration. If you are having difficulty, be sure that you have a clean, trimmed end of thread, and also that you have a proper size needle. A thread can't be placed in an eye that is too small for it. |
Starting/Anchoring a Working Thread
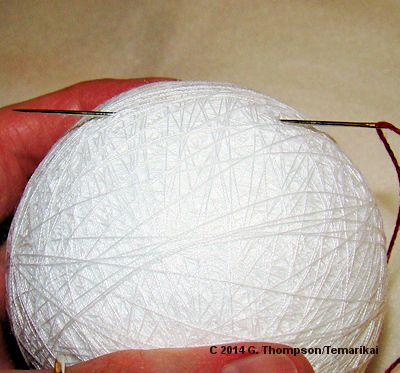 |
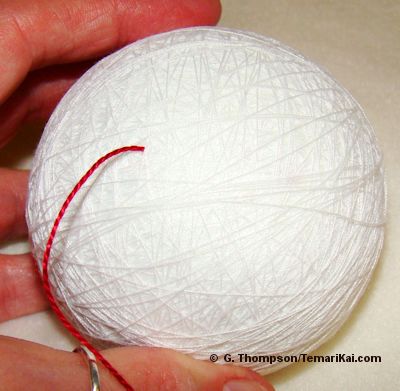
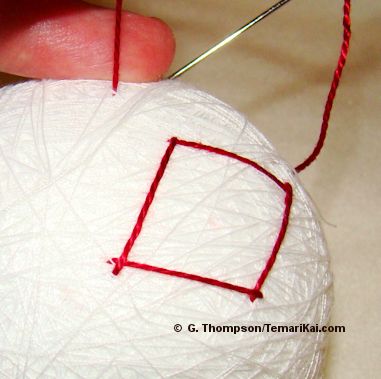
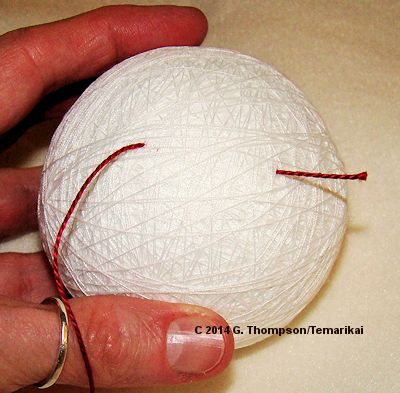 Using a working length of thread, run the needle through the upper layers of the mari wrap for a short distance (just use a little common sense). For a 23cm mari, I generally run for 1- 1 1/2" (3-4cm). Pull the thread through the mari wrap; note that the needle was placed deep enough in the mari layers so that there is no "bleed through" - you cannot see the thread under the mari surface. This is very important, all the time, when starting and stopping threads. |
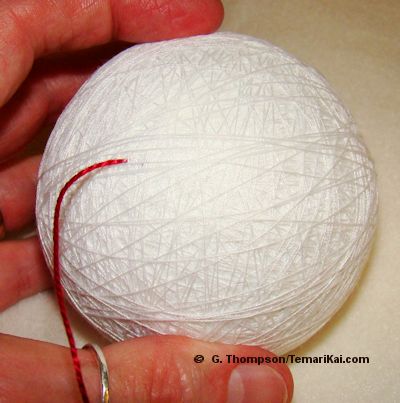 |
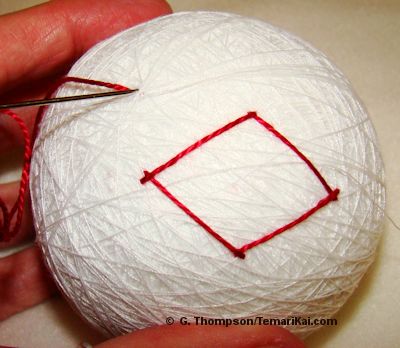
 Continue to pull the thread through the mari to completely hide the end (left). Just like working deep enough so the thread doesn't show through the mari wrap, neither do you want any residual of the end of the thread showing. Insert the needle in the exact same place that the thread exits the mari (right). It must be the same place - otherwise you will actually take a stitch and it will show. |
 |
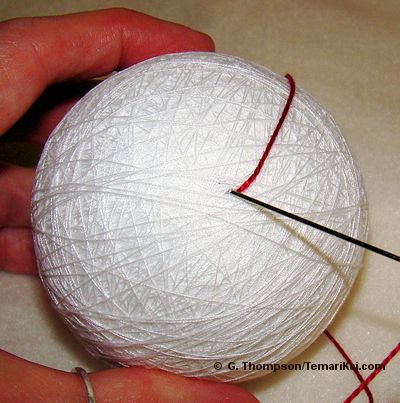
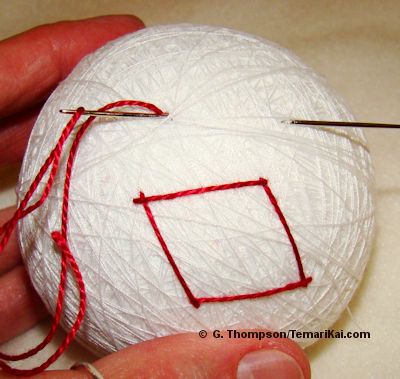
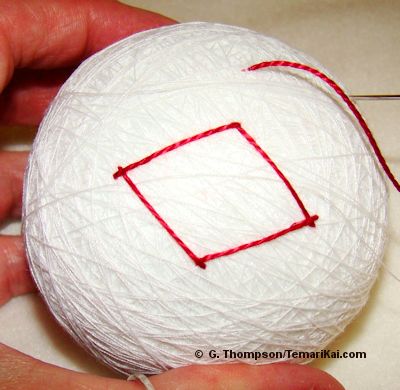
 Pull the thread through again, being careful to not allowing it to knot. Continue to pull the thread through until the loop completely disappears in the mari wrap. It will - and as you can see at right, you have a clean working thread ready to stitch with. The friction of the thread and wrap will hold it in place. |
| Depending on the threads being used to
stitch with, you may need to take an extra run under the mari
(in other words - work the thread back and forth twice instead
of once, under the mari wrap) in order to secure it to work.
This can happen with threads that are a bit more slippery, such
as rayon and some silks, or that are finer. It can also happen
with some metallics. If all else fails, yes, tie a small
overhand knot in the end and "pop" it under the mari wrap -
being sure that it completely disappears. However, using the "no
knot" method is more traditional and preferable. |
|
Ending a Working Thread
 |
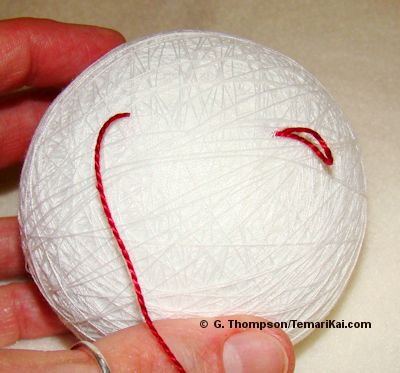
 To end a thread, as you take the last stitch, run the needle out a bit from the stitch. Pull the thread through. Just as in starting, insert the needle in the exact place the thread exited the mari. |
 |
 Run the needle under a short section of the mari, again being sure to go deep enough to not allow bleed-through. Pull the thread all the way through. |
 |
Hold the thread so it is straight up and down, perpendicular to the mari surface. Place your scissors flat against the mari surface, and while using a small degree of tension to hold the thread, clip it at the mari surface. When it releases the cut end will "pop" back into the mari and disappear. Again, if using finer or more slippery threads you may need to do more runs under the mari wrap to gain a secure anchor. |
This
is a TemariKai.com Printable Page; © 2014, all rights reserved.
Right click to print one copy for personal use.
Last updated 9/2014 © 1998 - 2014 TemariKai.com, G. Thompson/PuffinStuff, Inc.