
TemariKai ToolKit - Shikaku (Masu) 四 角 or ますかがり
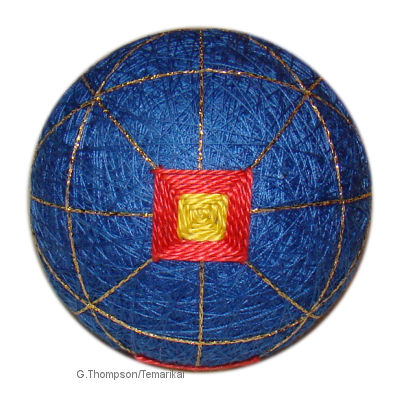
Shikaku is a solid or open square shape usually stitched around 2 perpendicular marking lines. It may also be referred to as masu, which comes from the small square box that was used in ancient times as a rice measure (either for cooking or for currency), which was called a masu. They
 came in
a few sizes depending on need and use. In modern Japan they are mostly
used to drink sake.
came in
a few sizes depending on need and use. In modern Japan they are mostly
used to drink sake. The actual design of the stitching sequence is simple; it's maintaining a regular, even outcome and precise shape as its worked that can be challenging. While shikaku is one of the four required stitches for JTA Honka certification, it's not recommended one's first temari project. Keeping shikaku true and plumb is the challenge. Even small errors are terribly obvious. There are several guides and markers to use that can make this a bit easier. A square obviously requires four corners created by a 4-point center. However, especially when learning, working on an 8-point center can help. The extra lines provide additional checks to keep things aligned. The 8 point center of a C8 is especially helpful since the marking lines outlining the square around the center also help.
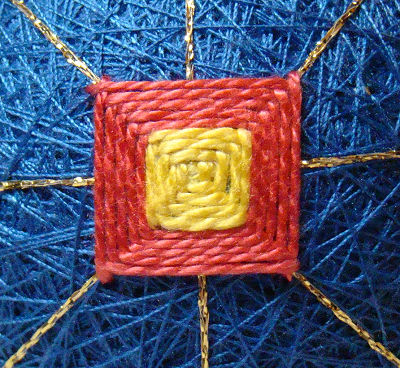 |
Four of the marking lines will form the corners of the square. The additional four lines that are perpendicular to the stitching threads help in making sure things stay even and aligned, since that perpendicular can be sighted as work progresses. The stitches form straight lines on the diagonals along with the marking lines being stitched around. It's important as you work to be sure the marking lines are straight, in place and have not shifted before stitches are taken. |
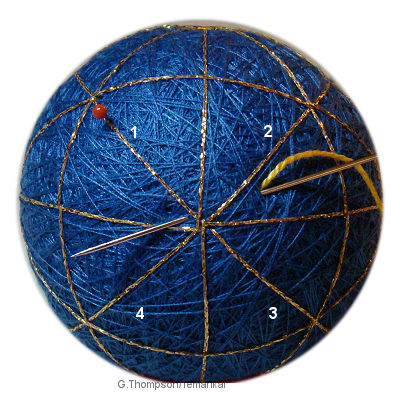 |
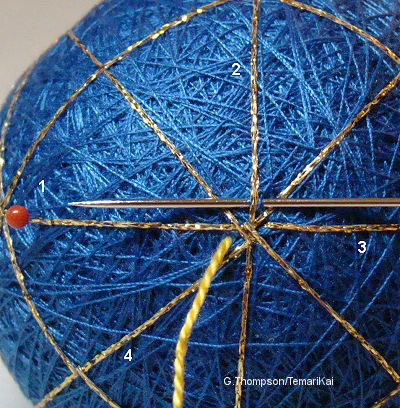
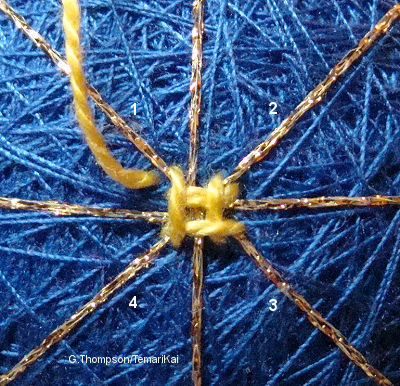
 It helps to place a pin on the starting line - the total number of rounds in solid polygons can be hard to see/count in the center. The marking lines have been numbered 1-4. Enter the thread just to the left of Line 1, but notice the placement. Allow about a thread's width out from the center as opposed to tightly placed. There needs to be room for the volume of the thread otherwise the center will not lay flat and smooth. For #5 perle, this is about 1-2 mm but it will vary with the thread being used. The goal as the first round is worked is to have s solid center, laying flat and smooth without a gap being seen in the center. |
 |
 Turn the mari 1/4 turn so that Line 2 is at 12 o'clock. Take a stitch, placing it the same distance out from the center that the thread was entered at on Line 2. |
 |
Turn the mari so that Line 3 is at 12 o'clock, and take a stitch using the same placement. Repeat on Line 4. |
 |
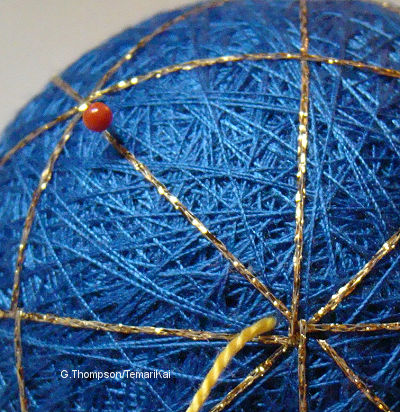
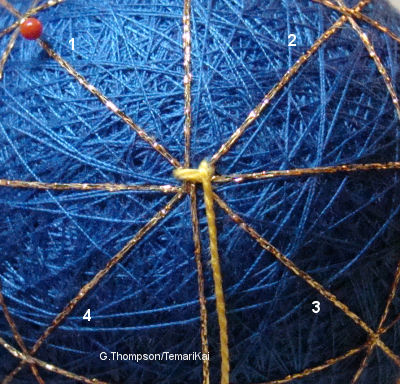
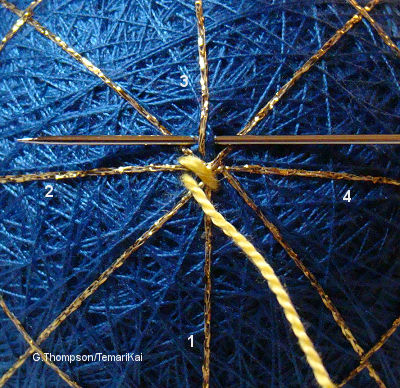
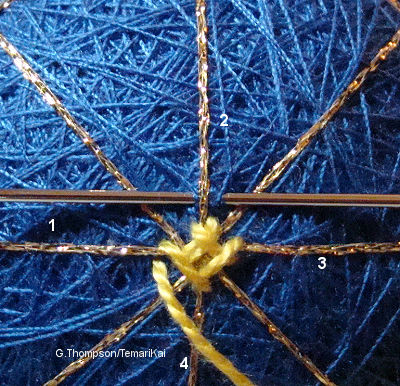
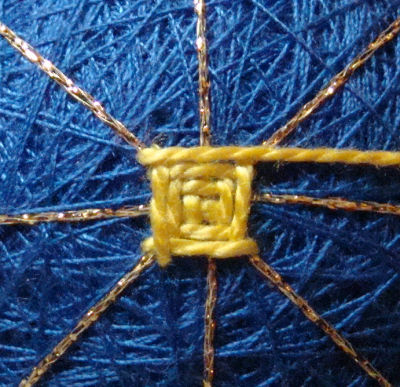
 Turn the ball again so that Line 1 is at 12 o'clock. This stitch will end the round - but notice the angle of the stitch placement. Rather than the needle being perpendicular to the marking line as is usual, it's angled up to the left, allowing a space of about a thread-width between the new stitch and the starting one below it. This is to set the thread up for working the next round so that it will be a clear new round and the threads do not spiral around the center. Each round should be distinct from the previous one as shown in the example photo above. It can be seen in the photo to the right that the thread is set up so that the next row will lay just above the starting row. |
 |
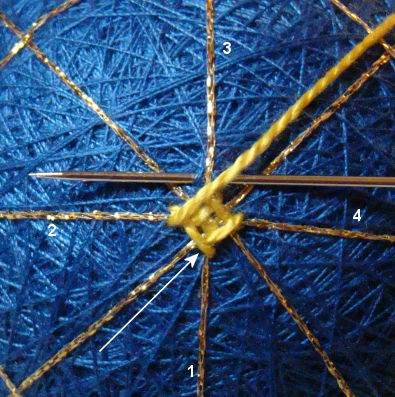 Turn the ball so that Line 2 is at 12 o'clock and take the stitch. Continue on in the same manner to complete each round. Notice how the "step up" in the stitches on Line 1/starting point (shown by the arrow in photo to right) maintains a plumb and even concentric growth of the shape. |
 |
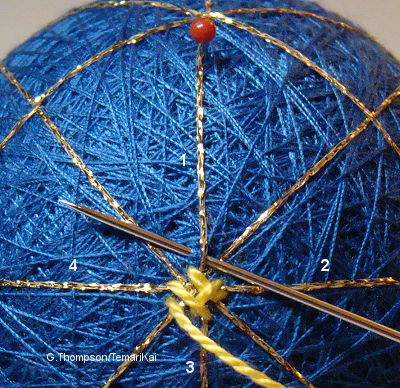
As you work, use the marking lines and stitching lines to help keep things aligned and plumb. When working on an 8-pt center, use the marking lines that are perpendicular to the stitching threads to help - they should indeed be perpendicular. Make sure as you stitch that the opposite sides of the square are parallel. If this is not maintained as work progresses, there isn't a rescue for it. The square needs to grow in all dimensions at the same rate: place pins a small & equal distance out on the stitching lines (corners of square) to use as "targets" - the stitches should approach these pins at the same rate (move them as needed). It is also imperative to always check that the marking lines have not shifted as the ball is handled, before placing stitches. |
|
The goal is a plumb (square) shape, meeting all of the usual geometric requirements of a square: equal length sides, and 4 90 degree angle corners. |
Keeping the shape even and regular is the main challenge with Shikaku. Some extra hints that can help are:
*) Use the marking lines to sight parallel and perpendicular
*) Set some "landscape" pins so that you have working targets to check against as you work.
*) When working more than one shape per temari, work several rows of each face in rotation rather than working all one shape at a time. This way you can check how the size and shape is progressing and adjust or correct as needed, to be sure that the shapes are even around the temari.
*) Always check that your marking lines are in place and have not skewed as you handle the ball, before you take a stitch.
*) Groom your threads as you go and correct mistakes early. They grow as you work and may not be adjustable after you've invested more time and effort.
This is a TemariKai.com Printable Page; © 2014, all rights reserved. Right click to print one copy for personal use.
Last updated 1/2014 © 1998 - 2014 G. Thompson/PuffinStuff, Inc.