
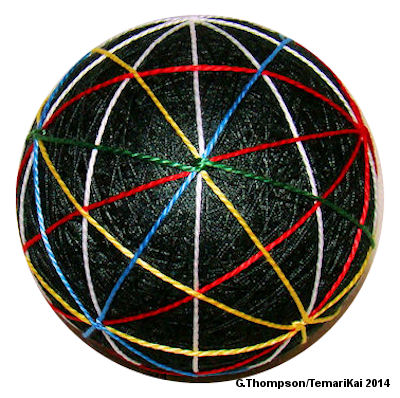
10-Combination Division - Jiwari : Marking Lines
After the pins have been placed to divide the mari, the next step is to lay down the marking lines. It's important to remember common sense and to not over-think things. It's also important to lay the lines accurate and purposefully, not just let them trail along after
 the needle. Tack
stitches need to be neat and clean. Division/marking
lines most often are worked with metallic thread that becomes an
integral part of the design (there are exceptions, of course) - this
example is using several colors of pearl cotton #5 in order to give
clear illustrations.
the needle. Tack
stitches need to be neat and clean. Division/marking
lines most often are worked with metallic thread that becomes an
integral part of the design (there are exceptions, of course) - this
example is using several colors of pearl cotton #5 in order to give
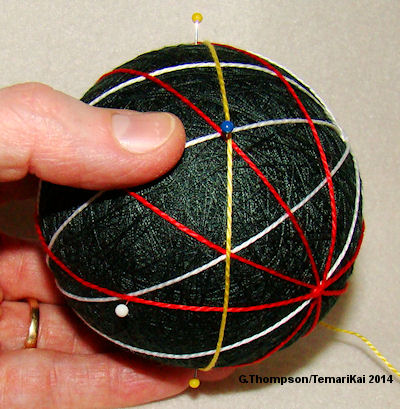
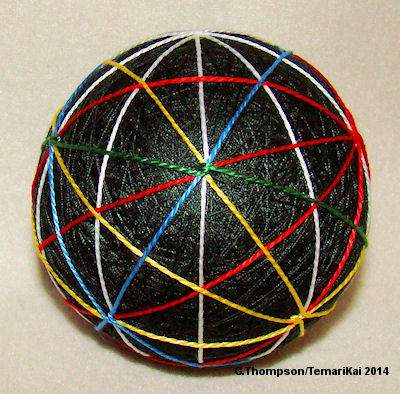
clear illustrations. Additional 10-point centers will be added (combined) on to the original 2 created with the simple 10 marking (shown in white at the photo to the right). They will all be evenly distributed around the mari, each pin being a center. Each pair of pins placed in the previous step will serve as a temporary NP/SP so that additional "simple 10" marking lines can be laid down. Remember to pass the thread to the same side of the pins as you lay them down. Marking lines are usually metallic threads that become an integral part of the temari design. Pearl cotton is being used here in order to provide easier illustration. A different color is used to correlate with each pair of pins placed to mark the centers. The most important hint to stay oriented in laying the marking lines is to remember that division lines MUST circumscribe the mari - that is, go around the full circumference of the ball. If you are laying a thread and it is not doing that, you're off track.
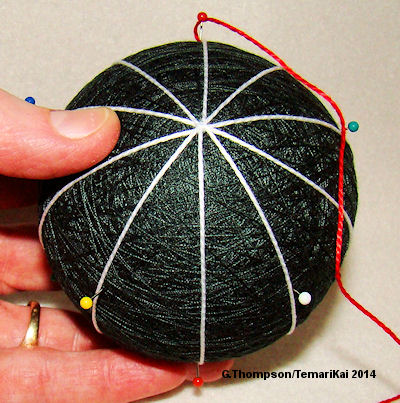 |
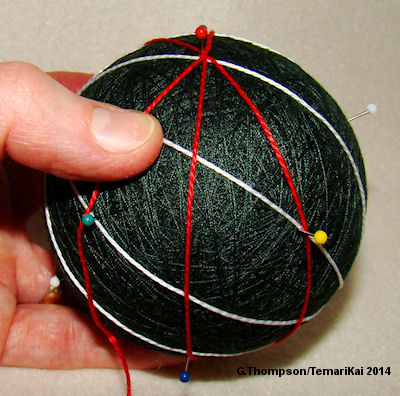
Choose one pair of pins (here it's red) to serve as a
temporary NP/SP. Orient the ball so that this pair is at the top
and bottom as you look at the ball. Measure off 4 wraps around
the ball of thread, plus enough to enter and exit. Anchor the
thread at the NP. |
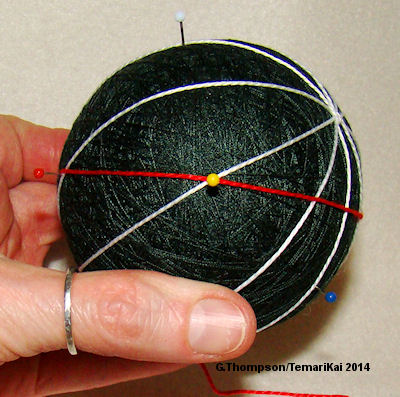 |
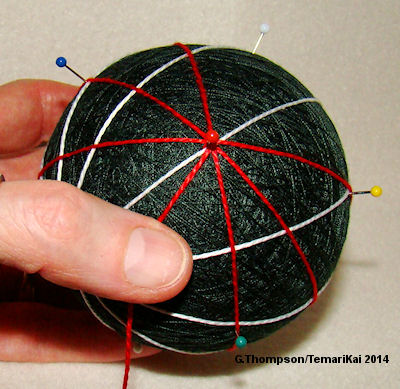
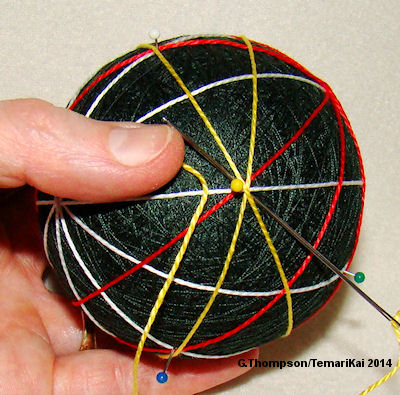
 Choose one of the any other pins, and carry the thread to it (here it's yellow). Pass on to the opposite red pin (SP). Notice the thread is going straight around the full circumference. Carry on past the opposite yellow pin, and back to the red NP pin. |
 |
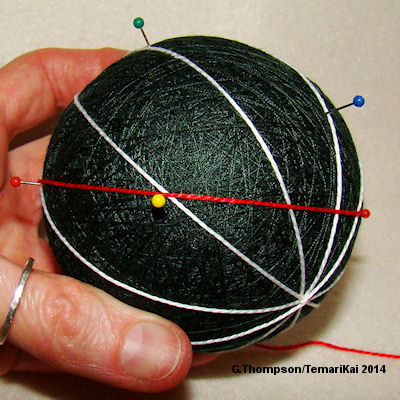
 Pass the thread around the red NP pin and move one pin to the left (remember this is like laying down a simple 10; the other pairs of pins form the vertical markers); here it's blue. Wrap as before, from red NP to blue to red SP to opposite blue, back to red NP. Move one pin to the left (green), and repeat the wrap. |
 |
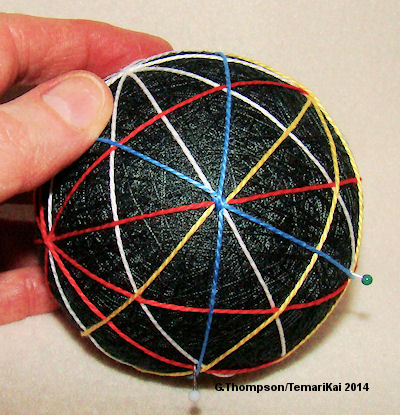
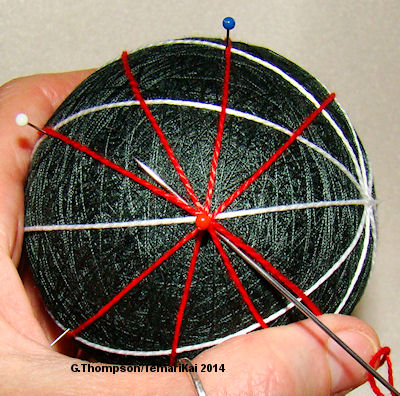 Move one pin to the left (and last pair) - here it's white - and repeat. This will complete the cycle for this NP/SP orientation (notice that there are now 10 lines radiating out from the center: 2 white and 8 red)), so when passing the red SP pin, tack the pole. |
 |
Return to the red NP pin, anchor and exit the thread. This now
completed 2 sets of 10-point centers; one from the original
simple 10 marking (in white) and 1 from the red pin pair (in
red). Remove the red pin pair. |
 |
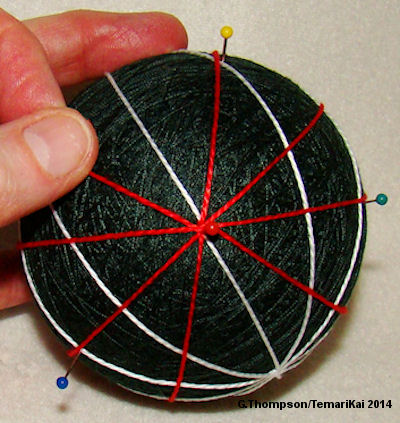
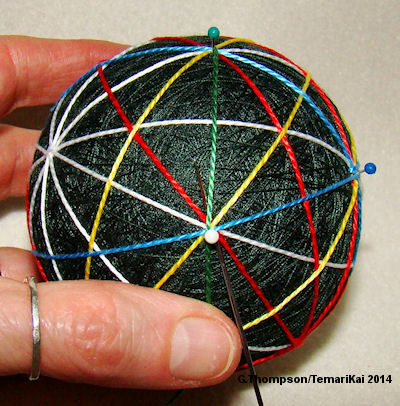
 Choose another pair of pins to serve as NP/SP - here it's yellow. Measure off 3 wraps (each set decreases by one wrap since all o the previous sets have contributed to the creation of the centers), and anchor the thread. Move one pin to the left (blue) of the last set of centers (red), and wrap as before.When completing the last pass, tack the yellow SP. Return to the yellow NP, anchor and exit the thread, and remove the yellow pins. |
 |
Select a third set of pins for the NP/SP, blue in the example. Measure off 2 wraps of thread; repeat the process of wrapping to the remaining pins (green and white). Notice that the threads are being placed carefully so that the intersections are sharp and clean; the triangles and diamonds that form the secondary faces of the division are emerging. |
 |
 There are two sets of pins remaining, but they will both be used in the last wrap. Measure off one wrap of thread, and anchor it at one of the remaining pins (green in the example) as the NP. Wrap once around the mari, tacking at each center as you go. The division is complete. The centers have all been tacked in place as the marking lines were placed; adjust any threads that have shifted out of place, and tack the corners of the pentagons (optional but very recommended) to maintain the accuracy of the marking. |
| There is a hint to adjusting (if needed) the lines back into place so that the pentagons are even. Don't focus on the pentagon but rather on the diamond face. If this is adjusted into symmetry, then the pentagons fall into place. | |
Last updated 1/2014 © 1998 - 2014 TemariKai.com, G. Thompson/PuffinStuff, Inc.