
10-Combination Division: Jyuttoubu no Kumiawase
Jyuttoubu no Kumiawase - the 10-Combination (also referred to as Combination 10, or C10) is one of the standard divisions in temari making. Mastering the C10 is the third major step in learning temari divisions (after simple and C8 divisions). The C108 builds off of a Simple10 so mastering simple divisions is a must before moving on to the combination divisions, but a wonderful world opens up to you
 when you add combination divides to
your repertoire.
when you add combination divides to
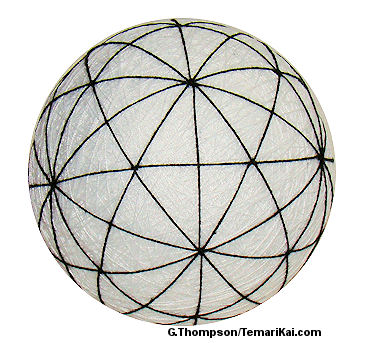
your repertoire.The C10 Division begins with marking a Simple 10. Remember, the definition of a combination division is "combining on", or adding on, more centers of the same starting value, symmetrically arranged around the ball. To create a Combination 10 you will add additional division lines which will, in conjunction with the vertical lines from the simple division create a marking that adds 10 more 10-point centers, just as the Simple 10 has 2 10-point centers. The outline shape of these 12 centers is a pentagon. As these centers are formed, there will be additional major faces appearing that become integral players in stitching C10 designs: 20 6-point triangles, and 30 4-point diamonds.
There are several options for pinning the centers of a C10 such as the V-Ruler and C10 Ruler. For many people these can be quicker methods than using a marking strip after a solid understanding of executing the division using the strip is learned. The paper strip is essential as basic knowledge - plus you may not always have other gadgets available. Ordinarily the marking threads would be fine metallic, but contrasting pearl cotton is being used her for demonstration purposes.
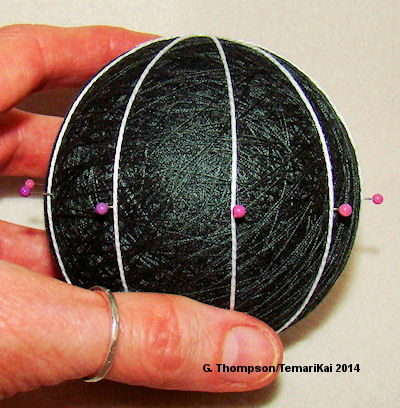 |
Begin by dividing and marking a Simple 10 ball but do not lay down the equator line (leave the pins in place that mark the S10 segments). Pin a new strip to the mari and cut to the circumference. This is a time when a calculator does come in handy. It is possible of course, to divide the strip by eye, but in modern temari making, a calculator can be handy. |
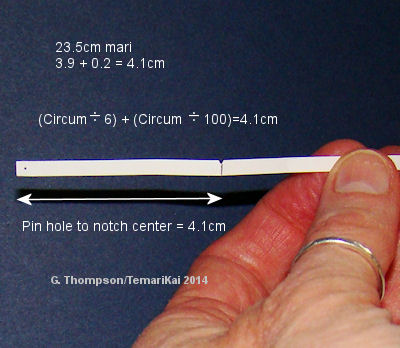 |
Determine the distance between the 12 10-point centers. The V-Ruler chart may be used but knowing how to figure it is a must. The distance between any adjacent 10-point centers in the division is 1/6 of the circumference plus 1/100 of the circumference. The 1/100 is not insignificant. It's the translation between linear & spherical. Ignoring it will result in uneven markings. An equivalent way to calculate it is to use 1/2 the circumference and divide by 3, but the 1/100 of the circumference must still be added. Measure the length of the marking strip (that has been cut to the mari's circumference), do the math, and cut a notch on the strip. |
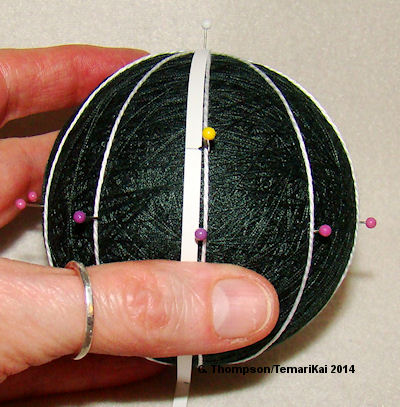 |
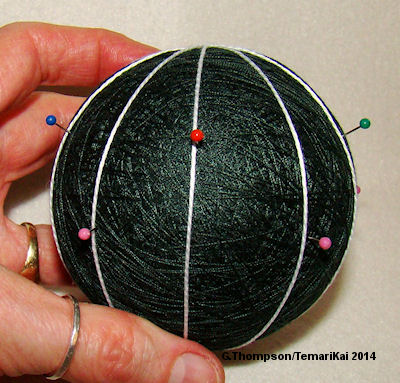
Prepare 5 pairs of pins, each in a different color (for
example, yellow, blue, green, red and white). Pin the new strip
to one of the simple 10 poles (use any color pin - there is no
standard NP or SP anymore since the marking is 3D). Wrap the
strip along one of the marking lines, and place a pin in the
notch. |
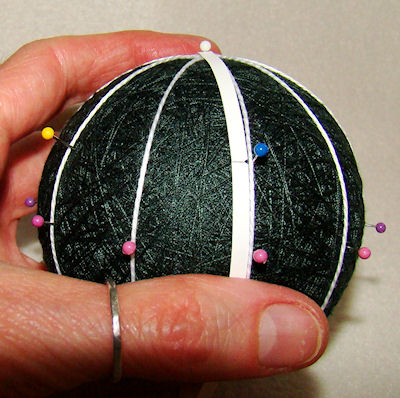 |
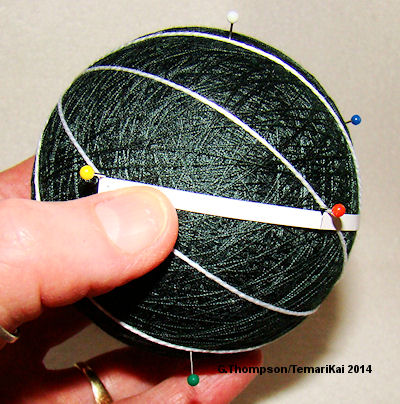
 Pivot the strip 2 lines to the right,choose a different color pin, and pin the notch. Pivot another 2 lines to the right and pin the notch, with a third color pin. |
 |
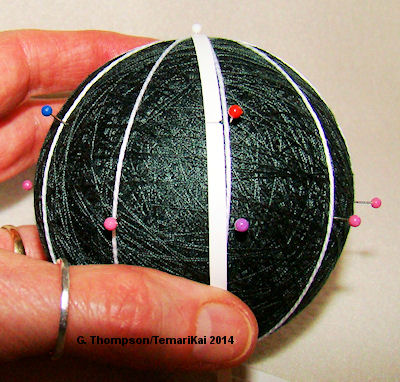
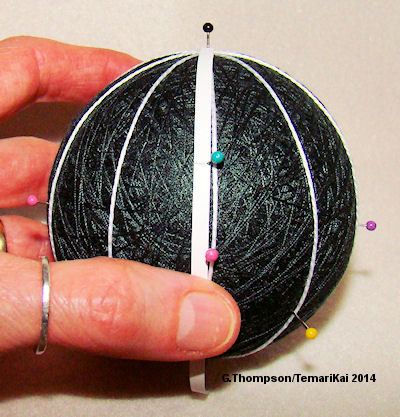
 Repeat
the pivot, skipping 2 lines, and pin the notch with a 4th color. Repeat
the pivot, skipping 2 lines, and pin the notch with a 4th color.Move another 2 lines to the right, pin the notch with the 5th color pin. This completes the upper half of the pin-marks. The equator pins can be removed from the lines that have been used to pin the notch marks on the upper half of the mari. |
 |
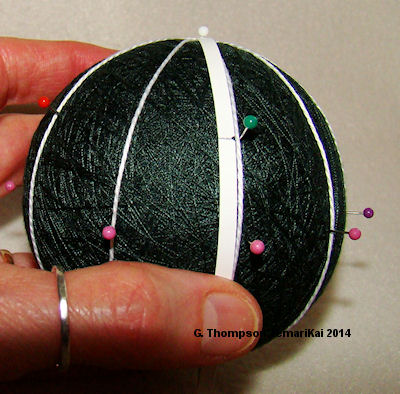
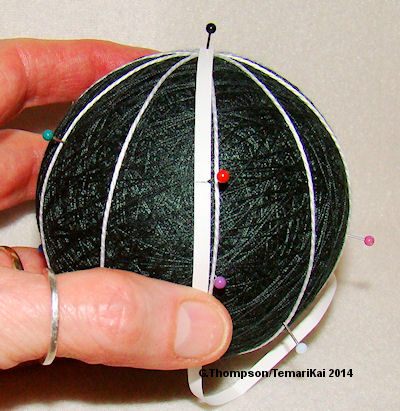
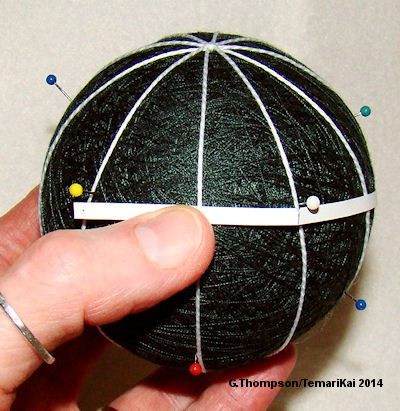
Unpin the marking strip from the ball. The mari should now appear similar to this, with half of the equator pins still in place on every other line, and C10 pins in place in the upper hemisphere of the mari on the alternate set of lines. |
 |
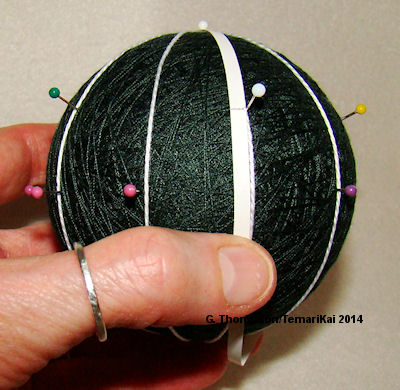
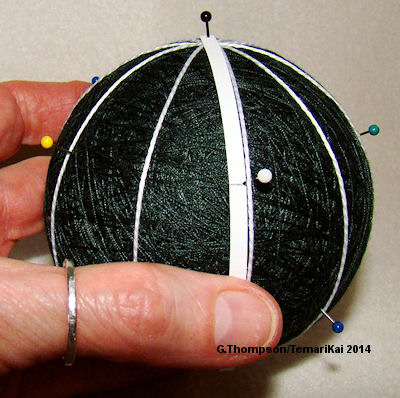
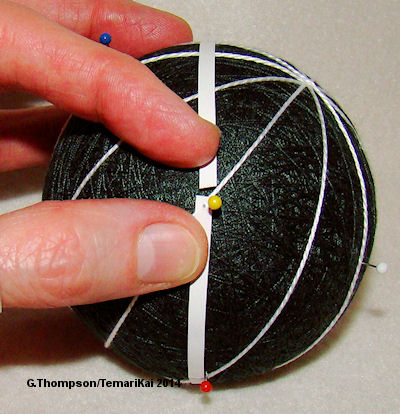
Turn the ball upside down, so that the set of pins just placed is in the bottom half (southern hemisphere) of the mari. Pin the marking strip to the pole at the top. The procedure for placing the pins is the same. Again, place a pin in the notch on a line that has an equator pin. Be sure to pair the colors: for example, the green pin placed here has its mate directly opposite on the other side of the mari. |
 |
 Turn
the ball 2 lines to the right, place another pin that matches
the color on the opposite side of the mari. Remove the equator
pins as you place the C10 pins. Continue around the ball until
you have marked the five lines in the southern hemisphere. Unpin
the marking strip from the ball. Turn
the ball 2 lines to the right, place another pin that matches
the color on the opposite side of the mari. Remove the equator
pins as you place the C10 pins. Continue around the ball until
you have marked the five lines in the southern hemisphere. Unpin
the marking strip from the ball. |
 |
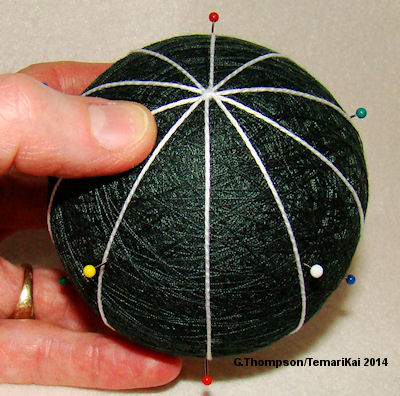
 Recall
that the centers are all an equal distance away from those
adjacent to it. Use the marking strip to check: choose any 3
pins as the corners of a triangle, and compare 2 of them to the
notch distance. Repeat on any other adjacent set; they are all
(or should be, within 1-2mm) the notch distance apart. Recall
that the centers are all an equal distance away from those
adjacent to it. Use the marking strip to check: choose any 3
pins as the corners of a triangle, and compare 2 of them to the
notch distance. Repeat on any other adjacent set; they are all
(or should be, within 1-2mm) the notch distance apart. |
 |
 Another
check is to be sure that for any pair of pins - in this case
yellow, if you wrap the strip around the ball so that yellow
pins are "NP" and "SP", the strip is full circumvention
(it would split the mari into 2 halves), and it should pass
along one other pair of pins (in this case, red). Another
check is to be sure that for any pair of pins - in this case
yellow, if you wrap the strip around the ball so that yellow
pins are "NP" and "SP", the strip is full circumvention
(it would split the mari into 2 halves), and it should pass
along one other pair of pins (in this case, red).Continue to the second step to place the marking threads |
This
is a TemariKai.com Printable Page; © 2014, all rights reserved.
Right click to print one copy for personal use.